Have you ever tried to remove a window screen, only to realize it doesn’t have those handy tabs you expect? It can be frustrating when you don’t know where to start or worry about damaging your screen or window frame.
But don’t worry—removing a window screen without tabs is easier than you think. In this guide, you’ll discover simple, step-by-step tips to get the job done quickly and safely. Keep reading, and you’ll master the technique without any hassle or stress.
Your windows will thank you!
Tools Needed
Removing a window screen without tabs can be tricky. Using the right tools makes the job easier and safer.
Gather these tools before you start. It helps you avoid damage to the screen or window frame.
Essential Supplies
These supplies are necessary for most screen removals without tabs. They help you lift, pry, and handle the screen carefully.
- Flathead screwdriver – to pry the screen gently
- Putty knife – to slide under the screen frame
- Work gloves – to protect your hands from sharp edges
- Soft cloth – to protect the window frame from scratches
- Step ladder – to reach higher windows safely
Optional Helpers
These tools are not always needed but can make the process faster and safer.
| Tool | Purpose |
| Needle-nose pliers | Grip small parts or pull out pins |
| Painter’s tape | Protect glass and frame edges |
| Rubber mallet | Tap gently without damaging the screen |
| Magnet tool | Retrieve dropped screws or pins |

Credit: www.ebay.com
Inspect The Window Screen
Removing a window screen without tabs can be tricky. It's important to understand your window's design and how the screen is attached.
Let's explore how to inspect and safely remove window screens without damaging them.
Check Frame Design
Window screens vary in design, and knowing the type helps in removal.
- Identify if the frame is aluminum or wood.
- Check for any visible screws or slots.
- Look for corner springs or tension clips.
Locate Hidden Fasteners
Hidden fasteners can secure the screen to the window frame. Discovering these is crucial.
Use a flashlight to spot hidden fasteners.
Common fasteners include:
| Type of Fastener | Description |
| Spring Clip | Metal clip that holds the screen in place. |
| Latch | Small hook securing the screen edge. |
| Push Pin | Plastic pin inserted into the frame. |
Prepare The Work Area
Removing a window screen without tabs needs a clean and safe work area. Preparing the space helps you avoid damage and work faster.
Clear the area around the window and protect surfaces before starting. This makes the task easier and safer.
Clear Surroundings
Remove any objects near the window. Clear furniture, decorations, and other items to have enough space.
This prevents accidents and gives you room to move and place the screen safely.
- Move chairs and tables away
- Remove fragile items or valuables
- Clear the floor under the window
Protect Surfaces
Cover floors and nearby furniture with drop cloths or old sheets. This protects from dirt and screen parts.
Use tape to keep covers in place. Protect window sills and frames with soft cloths or foam.
- Use plastic or fabric drop cloths
- Cover window sill with soft padding
- Secure covers with painter’s tape
Loosen The Screen Frame
Removing a window screen without tabs can be tricky. The first step is to loosen the screen frame carefully.
Loosening the frame helps free the screen from the window without damage.
Use A Flat Tool
Find a flat tool like a putty knife or a flathead screwdriver. This tool helps pry the screen frame gently.
Slide the tool between the screen frame and the window sash. Move it slowly to avoid bending the frame.
- Choose a tool with a thin edge
- Insert the tool at the corner of the screen
- Work the tool around the frame edges
Apply Gentle Pressure
Push the flat tool gently to loosen the screen frame. Do not force it hard to prevent damage.
Move the tool back and forth with light pressure. This helps the frame come free slowly and safely.
- Apply small, steady pressure
- Check if the screen moves easily
- Stop if you feel resistance and try another spot
Remove Screen Spline
Removing a window screen without tabs can be tricky. You need to focus on the screen spline first.
The spline holds the screen in place. Taking it out carefully helps avoid damage.
Identify Spline Type
Look closely at the spline. It can be made of rubber, vinyl, or foam. Each type feels different.
Knowing the type helps you choose the right tools to remove it safely.
- Rubber spline is flexible and smooth.
- Vinyl spline is firm and shiny.
- Foam spline is soft and spongy.
Extract Spline Carefully
Use a flathead screwdriver or spline removal tool. Gently lift one edge of the spline.
Pull the spline slowly to avoid tearing the screen or frame. Work your way around the frame.
- Start at a corner for easier removal.
- Keep the screen supported to prevent bending.
- Remove any old spline pieces before installing new ones.
Detach The Screen
Removing a window screen without tabs can be tricky. You need to be careful to avoid damage.
Follow these tips to detach the screen safely and easily.
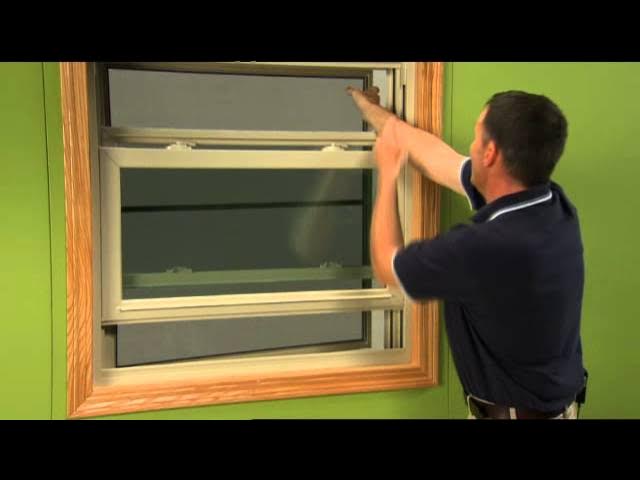
Lift Screen Frame Out
Start by gently lifting the screen frame from the bottom. Use even pressure to avoid bending.
If the screen feels stuck, wiggle it slightly to loosen it. Do not force the frame out.
- Place your hands at the bottom corners of the frame
- Lift slowly and evenly
- Wiggle gently if the frame resists
- Stop if you feel strong resistance
Handle Screen With Care
Once the screen is out, hold it carefully to avoid bending or breaking. The mesh is fragile.
Set the screen on a flat surface to keep it safe while you work on it.
- Hold the frame firmly but gently
- Avoid putting pressure on the mesh
- Place the screen on a clean, flat surface
- Keep it away from sharp objects
Troubleshoot Common Issues
Removing a window screen without tabs can be tricky. Some common problems may slow you down. Knowing how to fix these issues helps you work faster.
This guide covers stuck screens and damaged frames. Follow simple tips to handle these situations safely.
Stuck Screens
Sometimes, window screens get stuck in their frames. Dirt, paint, or rust can cause this. Try these steps to free a stuck screen:
- Use a flat tool like a putty knife to gently pry the edges.
- Spray a small amount of lubricant on the frame edges.
- Tap the frame lightly with a rubber mallet to loosen it.
- Work slowly around the entire screen to avoid damage.
- Wear gloves to protect your hands from sharp edges.
Take care not to force the screen too hard. Patience helps prevent breaks or bends.
Damaged Frames
Frames can crack or warp, making screen removal harder. Check the frame condition before you start.
| Frame Problem | Cause | Fix |
| Cracked corners | Old age or impact | Use gentle pressure; replace if broken |
| Warped frame | Moisture or heat | Apply heat to soften; reshape carefully |
| Loose screen fit | Frame damage | Use clips or fasteners to secure screen |

Credit: www.oakridgewindows.ca
Tips For Reinstalling Screens
Reinstalling a window screen without tabs can be tricky. Taking time to prepare the frame and screen helps the process go smoothly.
These tips focus on cleaning the frame and securing the spline properly. Follow them for a tight and lasting fit.
Clean Frame And Screen
Start by cleaning the window frame and screen. Dirt and dust can stop the screen from fitting well or cause damage later.
- Remove old debris from the frame using a soft brush or cloth.
- Wash the frame with mild soap and water, then dry it completely.
- Check the screen for holes or tears and repair or replace if needed.
- Make sure the screen edges are free of dirt before reinstalling.
Secure Spline Properly
Properly securing the spline holds the screen tight in the frame. Use the right tools and follow a careful method.
| Tool | Purpose |
|---|---|
| Spline Roller | Presses the spline firmly into the frame groove |
| Utility Knife | Trims excess spline and screen edges cleanly |
| Flathead Screwdriver | Helps remove old spline and adjust screen |
Press the spline into the groove evenly. Avoid gaps or loose spots. Trim extra spline with a sharp knife to prevent catching or damage.

Credit: www.reddit.com
Frequently Asked Questions
How Do You Remove A Window Screen Without Tabs?
To remove a window screen without tabs, gently push the screen frame inward. Then, carefully lift or angle it out of the window frame. Use a flat tool if needed to loosen the edges without damaging the screen or frame. If you encounter resistance while removing the screen, check for any hidden fasteners that may be holding it in place. When you learn how to remove window screens, it’s also helpful to note the screen’s orientation for easier reinstallation. Once removed, clean the screen and frame to ensure a smooth fit when you replace it. If the screen is particularly tight, you may need to wiggle it slightly as you lift to help free it from the frame. Once you successfully remove window screen from inside, inspect it for any damage before cleaning or storing it. A clean screen not only improves visibility but also helps maintain the overall appearance of your home.
What Tools Help Remove Window Screens Without Tabs?
A flat putty knife or a thin pry tool works well. These tools help gently loosen the screen frame from the window. Avoid sharp tools that can damage the screen or frame. Always work slowly to prevent bending or breaking the screen.
Can Window Screens Be Removed Without Damaging Them?
Yes, with patience and gentle pressure, you can remove screens without damage. Avoid forcing or bending the frame. Use proper tools to ease the screen out carefully. This preserves the screen’s shape and functionality for reinstallation.
Why Do Some Window Screens Lack Tabs?
Some window screens are designed without tabs for a sleeker look or older window models. They rely on friction or small clips to hold the screen in place. Understanding your screen type helps in choosing the right removal method.
Conclusion
Removing a window screen without tabs can seem tricky. Small tools and patience make the job easier. Gently pry the screen frame to avoid damage. Take your time and follow the steps carefully. This simple method saves money and effort.
Now, you can handle screen removal with confidence. Try it yourself and see the results. Keep your windows clean and fresh with ease.