If you’ve ever faced a leaky sink drain or struggled with a loose fitting, plumbers putty can be your best friend. But how do you use it correctly to create a tight, lasting seal?
You’re about to discover simple, step-by-step tips that make the job easy—even if you’re not a plumbing expert. By the end of this article, you’ll have the confidence to fix your sink drain like a pro and avoid costly leaks.
Keep reading to learn exactly how to apply plumbers putty and save yourself time and frustration.

Credit: www.angi.com
Choosing The Right Plumbers Putty
Plumbers putty helps seal sink drains and prevent leaks. Choosing the right type makes your work easier and more reliable.
Different putties suit different materials and conditions. Knowing these differences helps you pick the best one for your sink drain.
Types Of Plumbers Putty
There are several types of plumbers putty. Each type has unique features and uses. Choose one that fits your project needs.
- Traditional Oil-Based Putty:Soft and easy to mold. Works well with metal drains. Not good for granite or marble.
- Non-Staining Putty:Made for use with natural stone. Does not leave marks on granite or marble surfaces.
- Silicone-Based Putty:Flexible and water-resistant. Good for wet areas and long-term sealing.
- Latex Putty:Dries quickly and forms a strong seal. Best for temporary fixes or indoor use.
Factors To Consider
Pick a plumbers putty based on these key factors to ensure a good seal and easy installation.
| Factor | Details |
| Material Compatibility | Use non-staining putty for stone sinks. Traditional putty suits metal drains. |
| Water Resistance | Choose silicone putty for areas exposed to water often. |
| Ease of Use | Oil-based putty is easy to shape and remove if needed. |
| Drying Time | Latex putty dries fast but may not last as long as others. |
| Durability | Silicone putty offers long-lasting seals in tough conditions. |
:max_bytes(150000):strip_icc()/bathtub-overflow-drain-2718992-hero-e0b8644e690a485891107278fba6885f.jpg)
Credit: www.thespruce.com
Preparing The Sink Drain Area
Before using plumber's putty on a sink drain, prepare the area well. A clean and smooth surface helps the putty seal correctly.
Take time to remove dirt and old sealants. This makes the new seal last longer and prevents leaks.
Cleaning The Surface
Start by wiping the sink drain area with a damp cloth. Remove all dust, grime, and grease for a clean surface.
Use a mild cleaner if needed. Avoid harsh chemicals that can damage the sink finish or pipes.
- Wipe with warm water and mild soap
- Use a soft cloth or sponge
- Dry the area completely before applying putty
Removing Old Sealants
Old sealants can stop plumber’s putty from sticking properly. Scrape off any old putty or caulk around the drain.
Use a plastic scraper or putty knife to avoid scratching the sink. Clean the area again after removing the old sealant.
- Gently scrape old putty or caulk
- Use rubbing alcohol to remove residue
- Make sure the surface is dry before applying new putty
Applying Plumbers Putty
Plumbers putty helps create a watertight seal around sink drains. It is soft and easy to work with. Applying it correctly prevents leaks and water damage.
Follow simple steps to prepare and place the putty for a secure fit. This guide explains how to form the putty rope and place it around the drain.
Forming The Putty Rope
Start by taking a small amount of plumbers putty. Roll it between your hands to make a long, thin rope. The rope should be about the size of a pencil.
- Pinch off a lump of putty from the container.
- Roll it on a flat surface or between your palms.
- Make the rope long enough to circle the drain opening.
- Keep the rope smooth and even in thickness.
Placing Putty Around Drain
Once the rope is ready, place it around the drain’s underside flange. Press it gently but firmly to form a seal. Remove any extra putty that squeezes out.
| Action | Tip |
|---|---|
| Place rope evenly | Avoid gaps for best sealing |
| Press putty firmly | Use fingers to apply uniform pressure |
| Remove excess putty | Wipe off with a cloth before tightening drain |
Installing The Drain Assembly
Installing a sink drain assembly is easier with plumbers putty. This putty helps create a watertight seal between the sink and the drain.
Follow careful steps to align the drain parts and tighten them securely. This guide explains how to do it correctly.
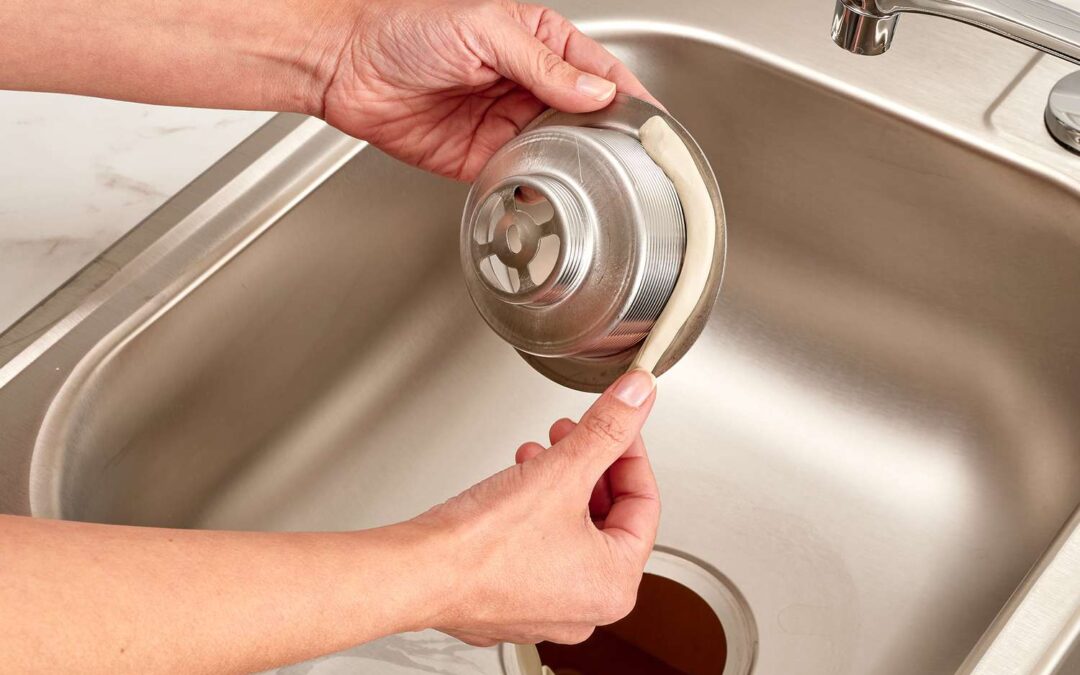
Aligning And Pressing Drain
First, roll a small amount of plumbers putty into a rope shape. Place this putty around the drain flange’s underside.
Next, press the drain flange firmly into the sink's drain hole. Make sure it sits evenly to avoid leaks.
- Apply putty evenly around the flange
- Insert flange into the drain opening
- Press down firmly to spread putty
- Check that flange is level and stable
Tightening The Locknut
Underneath the sink, slide the rubber gasket and cardboard washer onto the drain pipe.
Then, screw on the locknut by hand. Use a wrench to tighten it securely but avoid overtightening.
| Part | Function | Tips |
|---|---|---|
| Rubber Gasket | Seals drain pipe | Place flat against sink bottom |
| Cardboard Washer | Protects sink surface | Wet slightly for better seal |
| Locknut | Secures drain assembly | Tighten firmly but not too hard |
Checking For Leaks
After using plumber's putty on your sink drain, it is important to check for leaks. This ensures a tight seal and prevents water damage.
Careful inspection helps find any problems early. Fixing leaks quickly saves you time and money.
Running Water Test
Turn on the faucet to let water flow into the sink. Watch the drain area closely as water runs.
Look for water dripping or pooling under the sink. Even small drops show the putty seal is not perfect.
- Run water for about 5 minutes
- Check both the top and bottom of the drain
- Use a flashlight for better visibility
Inspecting For Gaps
After the water test, examine the putty around the drain. Look for cracks, gaps, or uneven areas.
A good seal has no spaces where water can leak through. If you find gaps, remove the drain and apply putty again.
- Check the entire circumference of the putty
- Press gently to feel for loose sections
- Replace the putty if it looks dry or cracked
Tips For A Durable Seal
Plumber's putty is essential for sealing sink drains. It keeps water from leaking and makes a tight fit.
Using it right means a longer-lasting seal. Follow these tips for the best results.
Avoiding Excess Putty
Too much putty can cause issues with the seal. It can also make a mess under the sink.
- Use just enough putty to cover the edge of the drain.
- Roll the putty into a thin rope, no thicker than a pencil.
- Press gently to avoid squeezing out excess putty.
Proper Maintenance
Keeping the seal in good condition is important. Regular checks can prevent leaks and damage.
| Task | Frequency |
| Inspect the seal | Once a month |
| Clean the drain area | Weekly |
| Replace putty if needed | Annually |
These tips help ensure a strong and durable seal for your sink drain.

Credit: www.familyhandyman.com
Frequently Asked Questions
What Is Plumbers Putty Used For On Sink Drains?
Plumbers putty seals sink drains to prevent water leaks. It creates a watertight barrier between the drain and sink. It is flexible and easy to mold, ensuring a tight fit. This putty helps maintain a leak-free and durable plumbing connection.
How Do I Apply Plumbers Putty On A Sink Drain?
Roll a small amount of putty into a rope shape. Apply it evenly around the drain flange’s underside. Press the flange firmly onto the sink drain hole. Tighten the drain assembly to secure the putty seal and prevent leaks.
Can Plumbers Putty Damage My Sink Surface?
No, plumbers putty is safe for most sink surfaces like stainless steel and porcelain. Avoid using it on granite or marble as oils may stain. Always check manufacturer recommendations before applying putty to delicate surfaces.
How Long Does Plumbers Putty Last On A Sink Drain?
Plumbers putty typically lasts many years if installed correctly. It remains flexible and watertight under normal conditions. However, it may dry out or crack over time, requiring replacement to maintain a proper seal.
Conclusion
Using plumber’s putty on a sink drain is simple and effective. Apply the putty evenly around the drain flange. Press the drain firmly to create a tight seal. This helps prevent leaks and water damage under your sink. Clean any extra putty after installation for a neat finish.
With practice, this task becomes quick and easy. Your sink will stay secure and leak-free for a long time. Give it a try next time you install or fix a drain. It saves money and keeps your plumbing safe.