Imagine a sudden leak flooding your home, and the panic of not knowing how to stop the water. Knowing how to replace your main water shut off valve can save you from costly damage and stress.
In this guide, you’ll learn simple, clear steps to handle this important task yourself. By the end, you’ll feel confident managing your home’s water supply and preventing emergencies before they start. Keep reading to take control of your plumbing and protect your home today.
Signs You Need A New Shut Off Valve
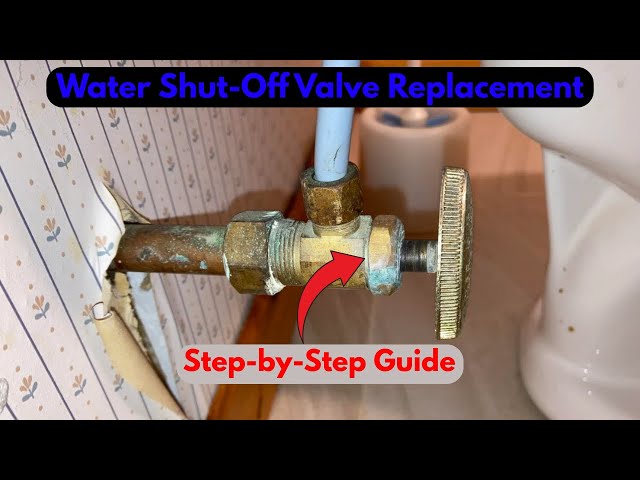
The main water shut off valve controls water flow to your home. It is important to keep it in good condition. Sometimes, the valve can wear out or break.
Knowing the signs of a failing valve helps you avoid water damage. It also ensures you can stop water quickly in an emergency.
Common Valve Problems
Shut off valves can develop many problems over time. Rust and corrosion are common issues. They make the valve hard to turn or cause leaks.
Another problem is a valve that won’t fully close. This can cause slow leaks or water flow when the valve is off.
- Rust or corrosion on the valve body
- Leaks around the valve handle or base
- Valve handle is stiff or stuck
- Valve does not fully stop water flow
- Visible cracks or damage to the valve
When To Replace The Valve
Replace the shut off valve if it shows serious signs of damage. If the valve leaks or cannot close fully, replacement is needed. A valve that is hard to turn may also fail soon.
Replacing the valve before it fails prevents water damage. It also ensures your plumbing system works safely and reliably.
- Valve leaks or drips water
- Valve handle is broken or missing
- Valve does not stop water flow
- Valve is very rusty or cracked
- Valve is old and shows wear signs
Tools And Materials Required
Replacing a main water shut-off valve is a crucial task for home maintenance. You'll need the right tools and materials to do this job safely and efficiently.
This guide will help you prepare by listing essential tools and how to choose the right valve for your needs.
Essential Tools
Before you start, gather these essential tools. Having them ready will make the process smoother.
- Adjustable wrench
- Pipe cutter
- Plumber's tape
- Bucket and towels
- Safety goggles
Choosing The Right Valve
The valve you choose affects the longevity and safety of your water system. Ensure you select the right type for your home.
| Type of Valve | Features |
| Gate Valve | Good for full flow |
| Ball Valve | Quick shut-off, durable |
| Globe Valve | Precise control, not for full flow |
Preparing For The Replacement
Replacing a main water shut off valve is a job that needs care and planning. Before starting, you must prepare the area and tools. This will make the work safer and easier.
Proper preparation helps avoid water damage and confusion. Follow these steps to get ready for the replacement.
Shutting Off The Water Supply
First, you need to turn off the water supply to your home. This stops water from flowing while you work on the valve.
Look for the main water meter or the city's shut off point. Use a wrench or valve key to close the valve completely. Check that no water comes out of taps inside the house.
- Locate the main water valve outside or in the basement
- Turn the valve clockwise to close it
- Open a faucet inside to check water flow stops
- If water still flows, try turning the valve tighter
Draining The Pipes
After shutting off the water, drain the pipes to remove any remaining water. This prevents spills when you remove the old valve.
Open all faucets in the house, starting from the highest floor. Let the water run out until it stops. Flush toilets several times to clear water from tanks and pipes.
- Open faucets on all floors
- Flush toilets to drain tanks
- Leave faucets open during the replacement
- Use towels to catch drips under the valve area

Credit: www.youtube.com
Removing The Old Valve
Removing the old main water shut off valve is a key step before installing a new one. It helps to stop water flow safely and prepares the pipes for replacement.
Take your time to loosen and detach the valve carefully. This prevents damage to the pipes and avoids leaks later on.
Loosening The Valve
Start by turning off the main water supply to the house. Use a wrench to loosen the valve nuts. Sometimes the valve may be stuck due to rust or corrosion.
- Apply a penetrating oil around the valve connections.
- Let the oil sit for 10 to 15 minutes.
- Use a pipe wrench to turn the valve counterclockwise.
- If it does not move, try tapping gently with a hammer.
- Keep turning until the valve loosens.
Detaching From Pipes
After loosening, remove the valve from the pipes. Pipes may hold old sealing material like tape or paste that needs cleaning.
| Tool | Use |
| Pipe wrench | Hold and turn the valve or pipe |
| Utility knife | Cut old sealing tape or paste |
| Wire brush | Clean pipe threads for a smooth connection |
| Rags | Wipe any water or debris |
Installing The New Valve
Installing a new main water shut off valve is important for home safety. This guide shows how to place and connect the valve properly.
Careful installation ensures the valve works well and prevents leaks or water damage.
Positioning The Valve
Place the new valve where the old one was removed. It should be easy to reach in an emergency.
Make sure the valve handle is clear of walls or pipes so it can turn fully.
- Align the valve with the water pipe
- Check that the handle moves freely
- Leave some space around the valve
Securing Connections
Attach the valve tightly to the water pipes. Use the right tools and materials for a strong seal.
Check all joints for leaks after connecting the valve to avoid water damage.
- Use plumber’s tape on threads
- Tighten connections with a wrench
- Do not over-tighten to avoid damage
- Test by slowly turning water back on
Testing The New Valve
After installing a new main water shut off valve, testing it is important. This step makes sure the valve works well and has no problems.
Testing helps avoid leaks and water damage later. Follow these checks to ensure your valve is safe and functional.
Checking For Leaks
Turn the water supply back on slowly. Watch the valve and pipe joints closely for any drops of water.
Leaks can appear as small drips or wet spots around the valve. Check the area for at least 10 minutes.
- Look at the valve handle and body
- Check pipe connections on both sides
- Feel around for any moisture or wetness
- Use a dry cloth to spot small leaks
Ensuring Proper Function
Open and close the valve fully several times. It should move smoothly without resistance or noise.
When the valve is closed, water flow should stop completely. When open, water should flow freely without restriction.
- Turn valve handle to the off position
- Check if water flow stops at faucets
- Turn valve handle back to the on position
- Confirm water flow returns to normal
- Listen for unusual sounds while turning
Safety Tips And Precautions
Replacing a main water shut off valve requires care. Safety is important to avoid accidents.
Follow these tips to protect yourself and your home during the process.
Handling Tools Safely
Use tools correctly to prevent injury and damage. Keep tools in good condition before use.
- Wear gloves to protect your hands from sharp edges.
- Use safety goggles to shield your eyes from debris.
- Check that all tools are clean and rust-free.
- Keep tools away from children and pets while working.
- Turn off the main power to any electric devices near the work area.
Avoiding Common Mistakes
Many problems happen from small mistakes. Learn what to watch for to do the job right.
| Mistake | How to Avoid |
|---|---|
| Not shutting off water fully | Turn the main valve completely to stop water flow. |
| Using wrong tools | Use tools made for plumbing work only. |
| Ignoring leaks after replacement | Check all joints and fittings for leaks before finishing. |
| Not wearing safety gear | Always wear gloves and goggles during work. |
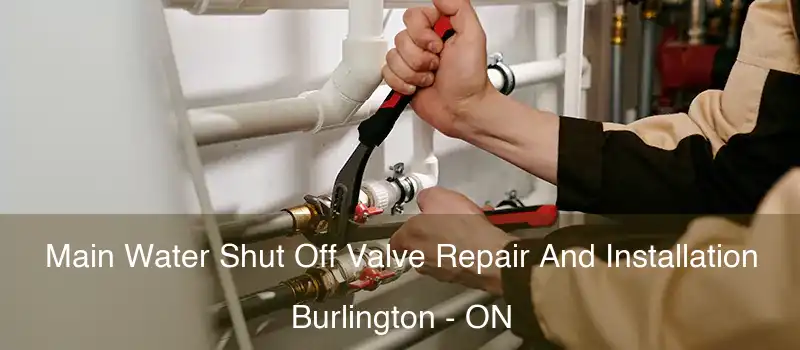
Credit: www.plumbingburlington.ca

Credit: electricleague.wordpress.com
Frequently Asked Questions
What Tools Are Needed To Replace A Main Water Shut Off Valve?
You need a pipe wrench, adjustable wrench, plumber's tape, pipe cutter, and a replacement valve. Safety gloves and a bucket help manage water spills.
How Do I Locate The Main Water Shut Off Valve?
Look near your water meter, usually in the basement or outside. It’s connected to the main water line entering your home.
How Long Does It Take To Replace A Main Water Shut Off Valve?
Replacing the valve usually takes 1 to 2 hours. Time varies based on valve type and plumbing complexity.
Can I Replace The Valve Myself Or Hire A Plumber?
DIY is possible with basic plumbing skills. For complex setups or leaks, hiring a licensed plumber ensures safety and compliance.
Conclusion
Replacing a main water shut off valve can save time and money. Follow each step with care and patience. Take safety measures seriously to avoid accidents. Use the right tools to make the job easier. Test the new valve to ensure it works well.
This simple task helps prevent water damage at home. Regular checks keep your plumbing in good shape. You can handle this repair with some effort and focus. Keep your home safe and dry by acting promptly.