If you rely on a water softener at home, keeping your salt tank clean is key to making sure it works well. Over time, salt buildup and debris can cause problems like poor water quality or system malfunctions.
But don’t worry—cleaning your salt tank is easier than you might think. In this guide, you’ll learn simple, step-by-step tips to get your water softener running smoothly again. Ready to improve your water and protect your system? Let’s dive in and make your salt tank shine!

Credit: huntersupertechs.com
Why Clean The Salt Tank
Cleaning the salt tank is important for your water softener to work well. Salt buildup can cause problems and reduce soft water quality.
Regular cleaning helps keep the system running smoothly and extends its life. It also prevents damage to the tank and other parts.
Common Salt Tank Issues
Salt tanks can face many issues if not cleaned often. These issues can stop the water softener from doing its job properly.
- Salt bridges form hard crusts that block salt use
- Salt mush creates a thick sludge that clogs the tank
- Dirt and debris settle at the bottom, causing blockages
- Corrosion can damage the tank walls and parts
- Bad smells come from stagnant water and salt buildup
Benefits Of Regular Cleaning
Cleaning the salt tank regularly gives many benefits. It keeps the water softener working at its best.
| Benefit | Effect |
| Improved Water Quality | Soft water without hard salt particles |
| Longer Equipment Life | Less damage and fewer repairs needed |
| Efficient Salt Use | Salt dissolves properly, saving salt and money |
| Prevents Clogs | Stops salt bridges and mush from blocking the system |
| Better Odor Control | Reduces bad smells from the tank |
Credit: azip.com
Tools And Materials Needed
Cleaning the salt tank on a water softener is important. It ensures your system works well. Let's look at what you need to get started.
You will need some basic tools and materials. Having these ready makes the job easier and faster.
Essential Cleaning Supplies
You'll need a few things to clean the salt tank. These supplies help you do a thorough job.
- Bucket for collecting water and salt
- Soft brush for scrubbing the tank
- Warm water to rinse the tank
- Dish soap for cleaning stubborn spots
Safety Precautions
Safety is important when cleaning the salt tank. Follow these precautions to stay safe.
Make sure you wear protective gear. This protects you from any chemicals or sharp edges.
- Wear rubber gloves to protect your hands
- Use goggles to shield your eyes
- Ensure good ventilation to avoid inhaling fumes
Preparing The Water Softener
Cleaning the salt tank is important for your water softener’s performance. Proper preparation makes the cleaning process easier and safer.
Before you start, take time to prepare the system. This helps avoid damage and ensures a smooth cleaning process.
Turning Off The System
First, turn off the water softener to stop its operation. This prevents water flow and salt use during cleaning.
Find the power switch or unplug the unit from the electrical outlet. Also, close the water supply valve to stop water entering the system.
- Switch off the power or unplug the unit
- Close the water supply valve
- Ensure no water flows into the softener
Draining The Salt Tank
Next, drain the salt tank to remove old salt and water. This step helps clean the tank completely.
Locate the drain valve or use a wet/dry vacuum to remove water. Be careful to avoid spills and clean the area around the tank.
- Open the drain valve if available
- Use a vacuum to remove leftover water
- Clean around the tank to catch spills
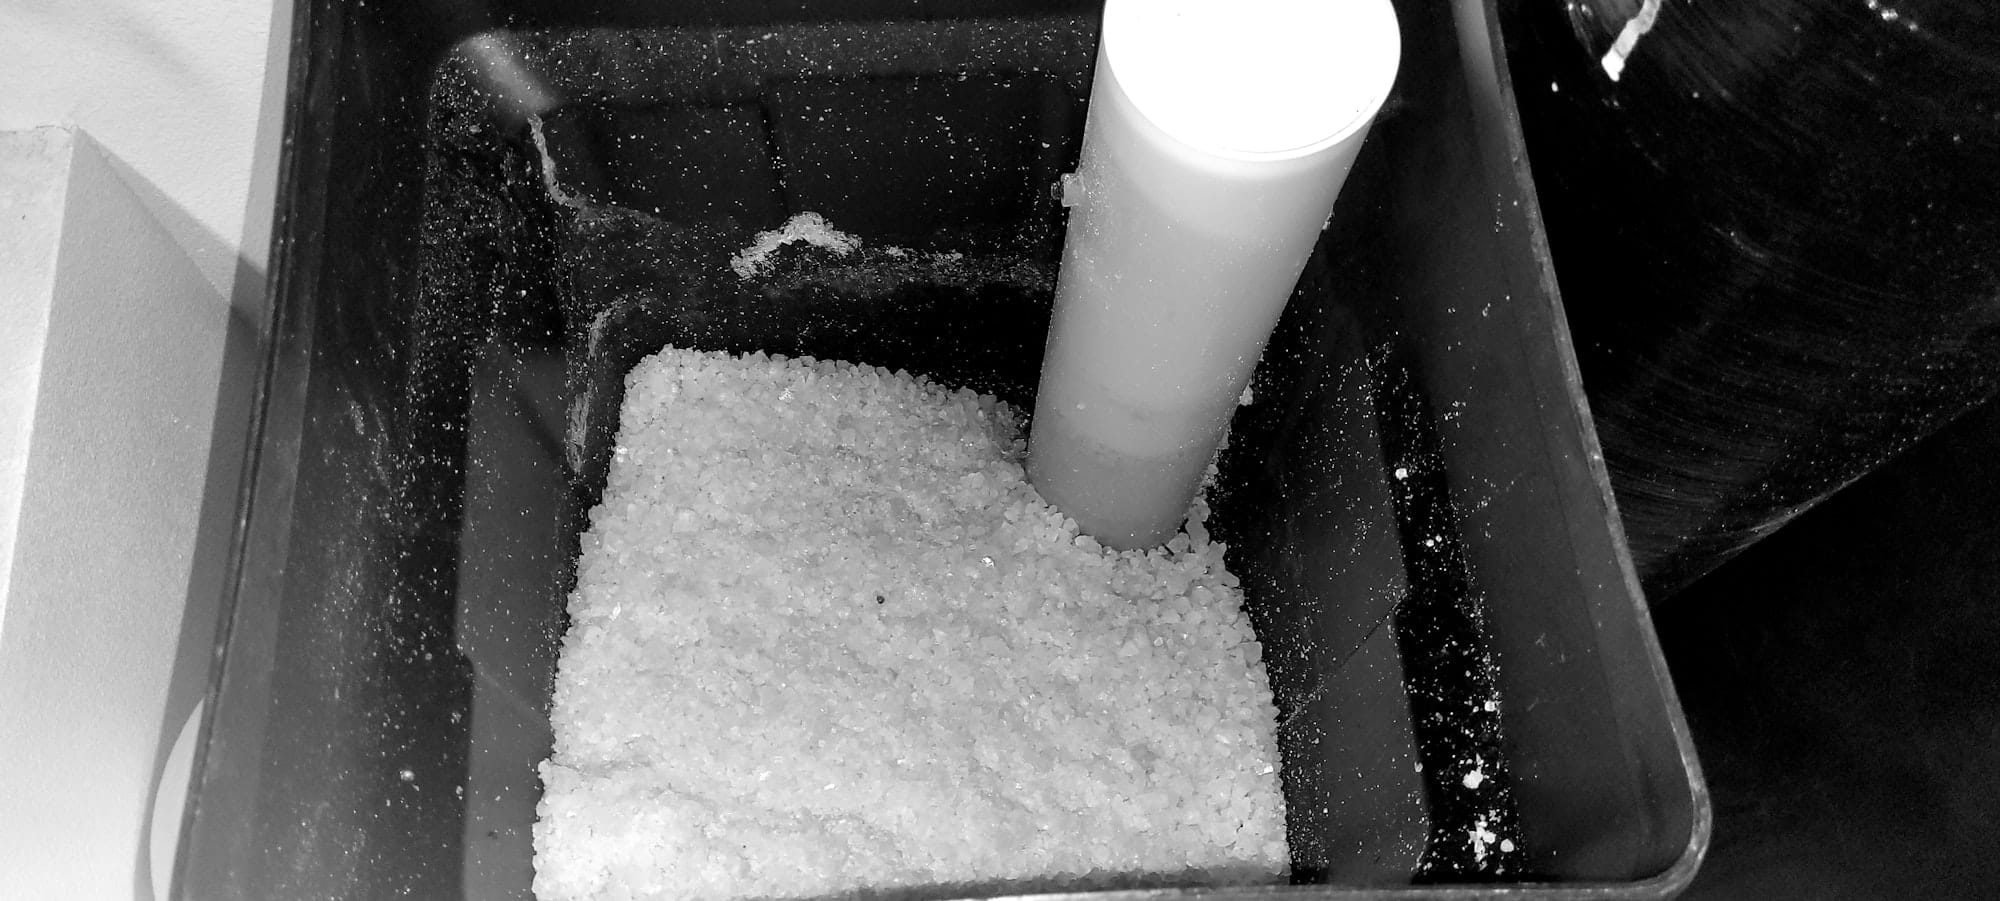
Removing Old Salt And Sludge
Cleaning the salt tank of a water softener helps keep it working well. Over time, salt residue and sludge build up inside the tank. Removing these deposits improves the softener's efficiency.
This guide covers two important cleaning tasks: scooping out salt residue and cleaning salt bridges and muck. These steps help maintain your water softener properly.
Scooping Out Salt Residue
Salt residue forms at the bottom of the salt tank. It looks like wet, mushy salt or hard chunks. Removing this residue prevents clogging and keeps the system running smoothly.
- Turn off the water softener and unplug it.
- Open the salt tank lid carefully.
- Use a scoop or small container to remove the wet salt and residue.
- Place the scooped-out salt in a bucket for disposal.
- Wipe the inside walls of the tank with a damp cloth.
- Refill the tank with fresh salt after cleaning.
Cleaning Salt Bridges And Muck
Salt bridges are hard crusts that form above the salt level. Muck is a dirty sludge that collects below. Both block salt from dissolving properly and harm softener function.
| Type | Description | How to Clean |
|---|---|---|
| Salt Bridge | Hard crust of salt above the water level | Break crust gently with a broom handle or stick |
| Muck | Sludge or dirt at the bottom of the tank | Scoop out with a cup or wet vacuum |
After removing bridges and muck, check the salt level again. Refill with clean salt and restart the softener. Regular cleaning prevents damage and keeps soft water flowing.
Washing The Tank Interior
Cleaning the salt tank is important to keep your water softener working well. Dirt and salt build-up can cause problems. Washing the inside of the tank helps remove these deposits.
This guide explains how to wash the tank interior safely and clearly. Follow these steps to keep your system clean.
Using Soap And Water
Start by mixing a mild soap with warm water. Use a soft cloth or sponge to clean the inside walls of the tank. Avoid harsh cleaners that can damage the tank.
Gently scrub the interior surfaces to remove salt residue and dirt. Make sure to reach all corners and edges inside the tank.
Rinsing Thoroughly
After washing, rinse the tank well with clean water. Remove all soap and salt traces to prevent contamination.
Use a hose or bucket to pour water in and out several times. Check that the water runs clear before finishing.
Inspecting The Tank And Components
Cleaning the salt tank on your water softener starts with a careful inspection. Look over the tank and all parts to find any problems.
Checking the tank helps keep your softener working well. It also stops leaks and other issues early.
Checking For Cracks Or Damage
Look closely at the salt tank for cracks or holes. These can cause salt water to leak out or let dirt in.
Check the tank walls and the lid. Also, inspect pipes and fittings connected to the tank.
- Look for cracks on the tank surface
- Check if the lid fits tightly
- Examine pipes for breaks or leaks
- Feel for soft spots or dents
Cleaning The Float And Other Parts
The float controls water level inside the tank. Dirt or salt build-up can stop it from working.
Remove the float carefully and rinse it under clean water. Clean other parts like the brine well and screens too.
- Take out the float gently
- Rinse off salt and dirt
- Clean the brine well with a soft cloth
- Check and clean screens or filters
- Reassemble parts after drying
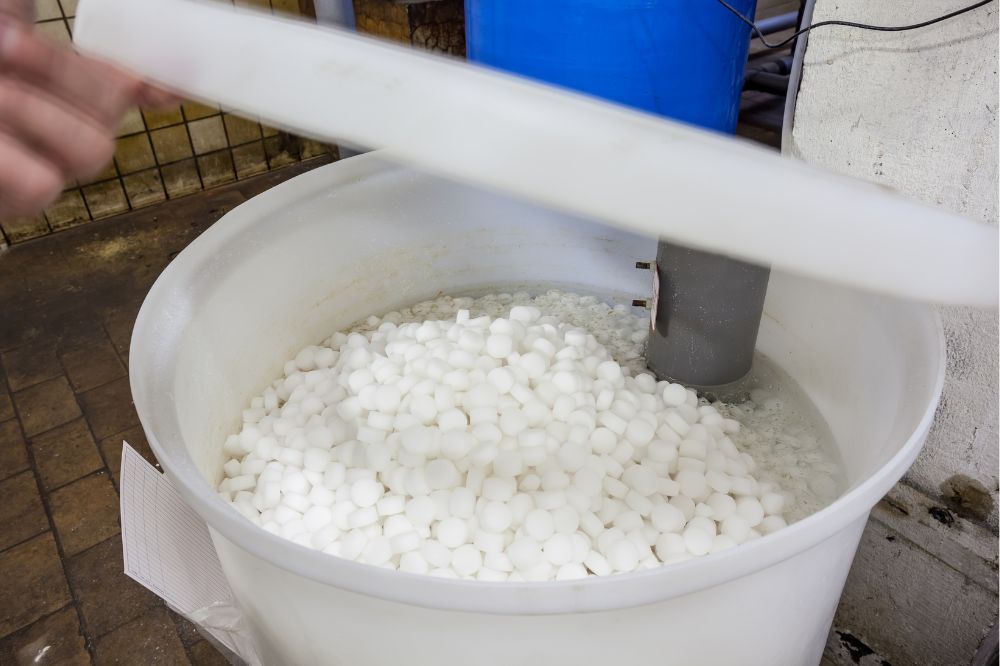
Refilling The Salt Tank
Keeping your water softener salt tank full is important for smooth operation. Regular refilling helps maintain soft water quality.
Follow these tips to choose the right salt and add it properly to your salt tank.
Choosing The Right Salt
Pick the best salt type to avoid problems like clogging and poor water softening.
- Use high-purity salt pellets designed for water softeners.
- Avoid rock salt with many impurities.
- Consider solar salt for cost-effective and clean results.
- Check the salt packaging for recommended use with softeners.
- Keep salt dry to prevent clumping inside the tank.
Adding Salt Correctly
Follow these steps to add salt safely and correctly to your water softener tank.
- Open the salt tank lid carefully.
- Check the salt level inside the tank.
- Pour salt slowly to avoid dust and spills.
- Fill the tank to about half or three-quarters full.
- Close the lid tightly to keep moisture out.
- Run a manual regeneration cycle if your softener needs it.
| Common Salt Types | Advantages | Disadvantages |
| Pellet Salt | Less residue, easy to handle | More expensive |
| Solar Salt | Natural, cost-effective | May contain minerals |
| Rock Salt | Cheap, widely available | Contains impurities |
Restarting The Water Softener
After cleaning the salt tank, you need to restart the water softener. This helps the system work properly again.
Restarting includes turning the system back on and running a regeneration cycle. Both steps are simple and important.
Turning The System Back On
First, make sure the power supply is connected. Turn on the water softener using the control panel or switch.
Check if the display lights up or if the system shows signs of power. This means the softener is ready to work.
- Connect the power cable if unplugged
- Press the power button on the control panel
- Look for display or indicator lights
- Ensure water supply to the unit is open
Running A Regeneration Cycle
Next, start a regeneration cycle to clean the resin beads inside the softener. This cycle refreshes the system after cleaning.
Use the control panel to select the regeneration option. Follow the instructions on your specific model to begin the cycle.
- Access the control panel menu
- Choose the regeneration or recharge option
- Confirm to start the process
- Wait for the cycle to complete (usually 1-2 hours)
Maintenance Tips To Prevent Build-up
Keeping your water softener's salt tank clean helps it work better and last longer. Salt build-up can cause problems in the system. Regular care stops these issues before they start.
Follow simple maintenance steps to keep your salt tank free from blockages and salt bridges. Check the tank often and use the right salt for best results.
Regular Inspection Schedule
Check your salt tank every month to catch build-up early. Look inside the tank for salt bridges or mushy salt. Clean the tank if you see thick salt crusts or clumps.
- Open the salt tank lid carefully.
- Break up any hard salt clumps with a broom handle.
- Remove salt mush with a scoop or small container.
- Wipe the inside walls of the tank to remove residue.
- Refill the tank with fresh salt if needed.
Best Salt Practices
Using the right type of salt and storing it properly helps reduce build-up. Keep salt dry and avoid mixing different salt types. Use pure salt to prevent minerals from clogging the tank.
| Salt Type | Benefits | Notes |
| Solar Salt | Cost-effective and widely available | May contain some impurities |
| Evaporated Salt | High purity, less residue | More expensive but cleaner |
| Rock Salt | Cheaper but contains more minerals | Can cause more build-up |

Credit: www.youtube.com
Frequently Asked Questions
How Often Should I Clean My Water Softener Salt Tank?
Clean your salt tank every 6 to 12 months. Regular cleaning prevents salt buildup and maintains efficient water softening. Check for salt bridges and sludge during cleaning to ensure optimal system performance and water quality.
What Supplies Do I Need To Clean A Salt Tank?
You need gloves, a bucket, warm water, dish soap, a sponge, and a towel. These supplies help safely remove salt residue and debris from your salt tank without causing damage.
Can I Use Bleach To Clean The Salt Tank?
Yes, use a small amount of bleach diluted in water. Bleach disinfects the tank but rinse thoroughly afterward to avoid harming your water softener system and water quality.
How Do I Remove Salt Bridges In The Tank?
Gently break salt bridges with a broom handle or similar tool. Avoid using sharp objects to prevent damage. Removing bridges allows salt to dissolve properly and maintain softener efficiency.
Conclusion
Cleaning the salt tank keeps your water softener working well. Regular care stops salt build-up and clogs. Simple steps save you time and money. A clean tank means better water quality for your home. Check your salt tank every few months.
Small efforts bring long-term benefits. Keep your water softener in good shape. Clean salt tank, clean water. Easy to do, and worth it.