Are you looking to add a personal touch to your home while saving money? Making your own shelf bracket out of wood is easier than you might think.
Imagine having a sturdy, custom-made bracket that perfectly fits your style and space. In this guide, you’ll discover simple steps to create a wooden shelf bracket that not only supports your shelves but also adds charm to any room. Keep reading, and by the end, you’ll have the confidence and know-how to build your own beautiful, functional shelf bracket.

Credit: www.reddit.com
Tools And Materials Needed
Making a shelf bracket out of wood requires the right materials and tools. You need to select good wood and have the basic tools ready. Safety is also important while working on this project.
This guide covers wood types, essential tools, and safety gear needed for building wooden shelf brackets.
Wood Types For Shelf Brackets
Choosing the right wood is important for strong and durable shelf brackets. Some woods work better than others.
- Oak: Very strong and long-lasting
- Pine: Easy to work with and affordable
- Maple: Hard and smooth finish
- Walnut: Dark color and sturdy
- Birch: Fine grain and stable
Essential Tools
You need a few basic tools to cut, shape, and fasten the wood pieces for your shelf brackets.
| Tool | Purpose |
|---|---|
| Saw (Hand or Power) | Cut wood to size |
| Drill | Make holes for screws |
| Screwdriver | Drive screws securely |
| Measuring Tape | Measure wood pieces accurately |
| Sanding Block or Paper | Smooth edges and surfaces |
| Clamps | Hold wood pieces in place |
Safety Gear
Wearing safety gear protects you from injuries while cutting and assembling wood.
- Safety glasses to protect your eyes
- Work gloves to protect your hands
- Dust mask to avoid breathing wood dust
- Ear protection if using loud power tools
- Closed-toe shoes for foot safety

Credit: www.create-enjoy.com
Designing Your Shelf Bracket
Making a shelf bracket from wood is a creative task. It involves planning and precision. Your design should be both functional and appealing.
Follow these steps to ensure your shelf bracket is sturdy and stylish. Consider size, design, and marking techniques.
Choosing The Right Size
The size of your shelf bracket depends on the shelf's purpose. Consider the weight it needs to support. Measure carefully to ensure a good fit.
- Determine the width and height needed.
- Consider the thickness of the wood.
- Ensure the bracket is proportional to the shelf.
Simple Vs Decorative Designs
Decide if you want a simple or decorative design. Simple designs are easier to make. Decorative ones add character to your space.
| Design Type | Characteristics |
| Simple | Clean lines, minimal detail |
| Decorative | Intricate patterns, more detail |
Marking The Wood
Marking the wood accurately is crucial. It ensures your cuts are precise. Use the right tools to avoid mistakes.
- Use a ruler or measuring tape for accuracy.
- Mark lightly with a pencil to avoid permanent lines.
- Double-check measurements before cutting.
Cutting The Wood Pieces
Cutting the wood pieces is an important part of making a wooden shelf bracket. You need to cut the wood carefully to get the right shapes and sizes. This helps the shelf bracket hold weight safely.
In this guide, you will learn how to measure and mark cuts, use a saw safely, and sand the edges for a smooth finish.
Measuring And Marking Cuts
Accurate measurements and clear markings make cutting easier and more precise. Use a tape measure and a pencil to mark the wood pieces before cutting.
- Measure twice to avoid mistakes.
- Mark straight lines with a ruler or square.
- Label each piece to know where it goes.
- Check your markings before cutting.
Using A Saw Safely
Using a saw safely protects you from injury. Follow these safety tips when cutting your wood pieces.
- Wear safety goggles and gloves.
- Secure the wood firmly with clamps.
- Keep your hands away from the blade.
- Cut slowly and steadily along the mark.
- Turn off the saw before moving or adjusting it.
Sanding The Edges
Sanding removes rough edges and splinters. It also helps the wood look smooth and neat.
| Sandpaper Grit | Purpose |
| 80 | Remove large rough spots |
| 120 | Smooth edges and surfaces |
| 220 | Finish for a smooth touch |
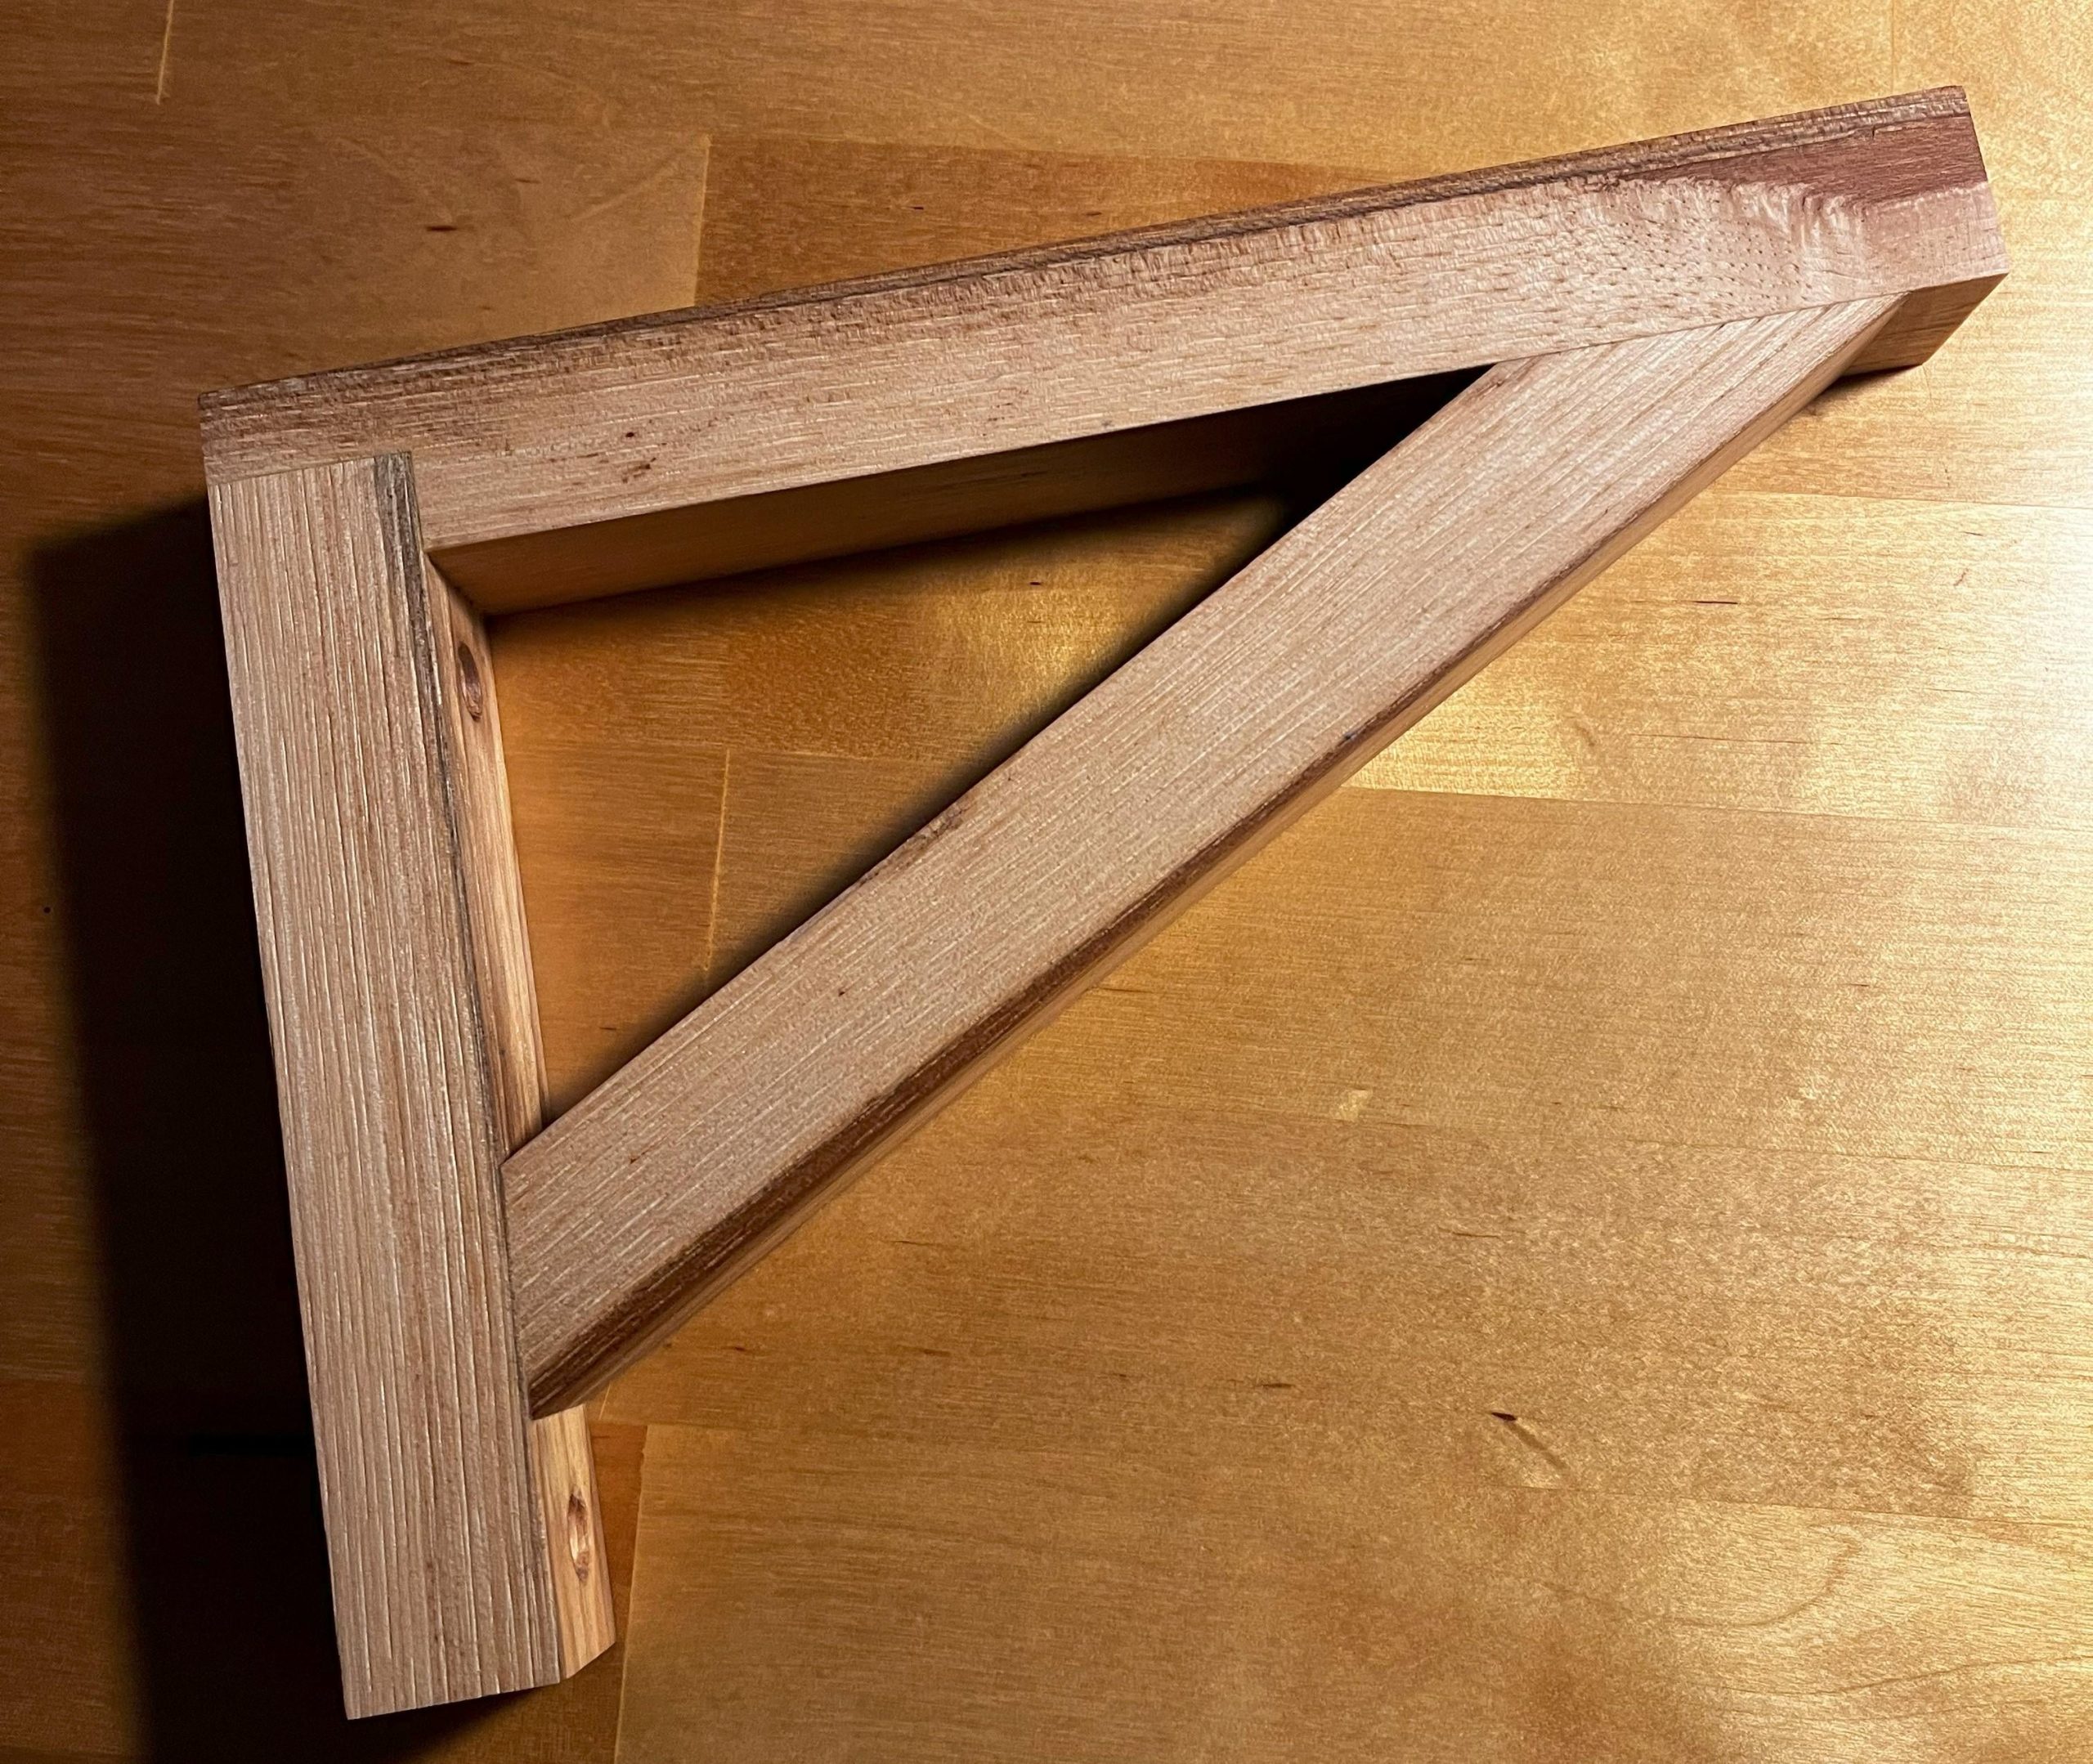
Assembling The Bracket
Building a wooden shelf bracket needs careful assembly. This ensures it holds weight and lasts long.
Follow these steps to join the parts securely and make a strong bracket.
Joining Techniques
Use simple methods like butt joints or miter joints to connect the wood pieces. Cut edges clean and fit them tightly.
- Butt joint: join ends at 90 degrees
- Miter joint: join edges cut at 45 degrees
- Reinforce joints with dowels or nails if needed
Using Wood Glue And Screws
Apply wood glue on the joining surfaces for a strong bond. Clamp the pieces to hold them in place.
| Tool | Purpose |
|---|---|
| Wood Glue | Bonds wood pieces tightly |
| Screws | Secure joints and add strength |
| Clamps | Hold pieces while glue dries |
After gluing, drill pilot holes to avoid splitting. Insert screws to hold the bracket firmly.
Ensuring Stability
Check that the bracket is square and fits well on the shelf and wall. Stability is key for safety.
- Verify all joints are tight and glued
- Use a level to check alignment
- Tighten screws without cracking wood
- Test bracket by applying light pressure
Finishing Touches
Finishing a wooden shelf bracket makes it look nice and last longer. Proper finishing protects the wood from damage.
Use sanding, painting or staining, and sealing to complete your project well. Each step improves the bracket’s strength and style.
Sanding And Smoothing
Start by sanding the wood to remove rough spots and splinters. Use fine-grit sandpaper for a smooth surface.
Sand along the wood grain to avoid scratches. Clean off dust with a dry cloth before moving on.
Applying Paint Or Stain
Apply paint or stain to add color and protect the wood. Use a brush or cloth to spread it evenly.
Let the first coat dry fully. Add a second coat if the color looks thin or uneven.
- Choose paint for bright, solid colors
- Choose stain to show the wood grain
- Work in a well-ventilated area
Sealing For Durability
Seal the bracket with a clear finish to protect it from water and wear. Use polyurethane, varnish, or lacquer.
Apply thin, even coats and let each dry before adding another. This step keeps the wood strong and looking good.
Installing The Shelf Bracket
Installing a wooden shelf bracket needs care and accuracy. You must secure the bracket well for safety.
This guide will help you install the bracket step-by-step. Follow the tips to make the shelf strong.
Locating Wall Studs
Wall studs are the wooden beams behind your wall. You need to find them to hold the bracket firmly.
Use a stud finder or tap the wall to listen for a solid sound. Mark the stud locations with a pencil.
- Stud finder tool gives accurate results
- Knock gently to hear a solid sound
- Studs are usually 16 or 24 inches apart
- Mark spots clearly before drilling
Mounting Hardware Options
Choose screws or bolts made for wood to mount the bracket. Use hardware that fits your wall type.
Check the bracket's holes and pick screws that fit tightly. Use wall anchors if you cannot hit a stud.
- Wood screws for direct stud mounting
- Wall anchors for drywall without studs
- Use long screws for better hold
- Check hardware size for bracket holes
Leveling And Securing
Use a level tool to make sure the bracket is straight. Mark the screw points before drilling holes.
After securing screws, re-check the level. Tighten screws fully to keep the bracket steady and strong.
- Place bracket on marked studs
- Use a level to check horizontal line
- Mark screw holes with a pencil
- Drill pilot holes before screwing
- Tighten screws and check stability
Tips For Customization
Making a wooden shelf bracket lets you add personal touches. Customization makes your bracket fit your style and needs.
Use simple ideas to decorate, finish, or add features to your shelf bracket. These tips help you create a unique piece.
Adding Decorative Elements
Decorative elements can make your shelf bracket stand out. You can carve shapes, add patterns, or use wood burning tools. Consider painting your brackets in vibrant colors or applying a stain that complements your decor. Once you’ve enhanced your shelf brackets, you can move on to learning how to install floating shelves, ensuring that your beautiful creations are securely mounted. Experimenting with various finishes and textures can also add depth and character to your shelving project.
- Carve simple geometric shapes for a modern look
- Use a wood burner to create patterns or designs
- Attach small wooden appliques for extra detail
- Paint or stencil designs for color and style
Using Different Wood Finishes
Wood finishes protect the bracket and change its appearance. Choose finishes that match your room’s style.
| Finish Type | Effect | Use |
| Clear Varnish | Shiny, natural wood look | Protects and highlights grain |
| Stain | Changes wood color | Matches furniture or walls |
| Paint | Opaque color | Adds bold or soft colors |
| Oil Finish | Matte, smooth feel | Enhances wood texture |
Incorporating Hooks Or Accessories
Add hooks or other accessories to increase the bracket’s use. This makes it functional beyond holding shelves.
- Attach metal hooks for hanging keys or small items
- Install small shelves or holders on the bracket
- Add decorative knobs for a stylish touch
- Use magnets to hold metal tools or notes

Credit: www.create-enjoy.com
Frequently Asked Questions
What Materials Are Needed To Make A Wooden Shelf Bracket?
You need wood, screws, a saw, drill, sandpaper, and a measuring tape. Choose hardwood for strength and durability.
How Do You Measure Wood For Shelf Brackets?
Measure the desired bracket length and height. Mark these on the wood using a pencil and ruler for accuracy.
What Type Of Wood Is Best For Shelf Brackets?
Hardwoods like oak, maple, or birch are ideal. They offer strength and support for heavy shelves.
How Do You Attach Wooden Shelf Brackets To The Wall?
Use wall anchors or screws suitable for your wall type. Drill pilot holes and secure brackets firmly.
Conclusion
Making a wooden shelf bracket is simple and rewarding. You only need basic tools and wood pieces. Follow the steps carefully and take your time. This project improves your DIY skills and adds charm to your space. Try different designs to match your style.
Wooden brackets hold shelves firmly and look great. Enjoy your new shelf and feel proud of your work. Keep practicing to build even better projects next time. Small efforts bring big results. Give it a go!