If you need a quick and reliable way to control water flow in your home, installing a Sharkbite shut off valve is the perfect solution. You don’t have to be a plumbing expert to do it, and with the right steps, you can save time and avoid costly repairs.
In this guide, you’ll learn exactly how to install a Sharkbite shut off valve easily and safely. By the end, you’ll have the confidence to handle this simple plumbing upgrade on your own. Keep reading to discover the straightforward process that will put you in control of your water system.
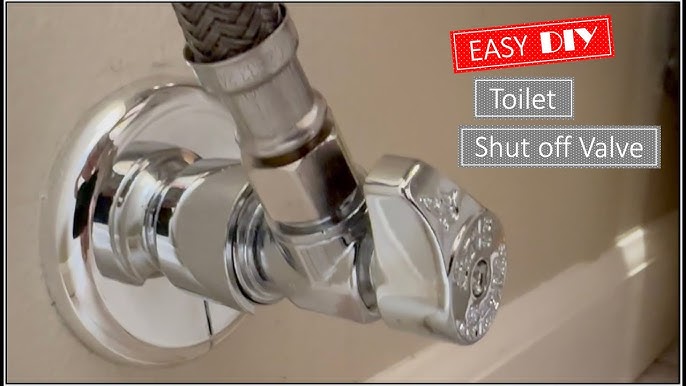
Credit: www.youtube.com
Tools And Materials Needed
Installing a Sharkbite shut off valve is simple if you have the right tools and materials. This guide helps you prepare everything before starting the job.
Having the correct tools makes the installation safe and fast. It also ensures the valve works properly.
Sharkbite Shut Off Valve
The Sharkbite valve is the main part you will install. It allows you to stop water flow without cutting the pipe.
Choose the right size for your pipe to ensure a tight fit and no leaks.
Pipe Cutter
A pipe cutter helps you make a clean and straight cut on the pipe. This is important for a good connection.
- Use a cutter designed for copper or PEX pipes
- Avoid using saws that can damage the pipe edges
- Rotate the cutter evenly around the pipe for a smooth cut
Deburring Tool
A deburring tool removes sharp edges inside and outside the pipe. This helps prevent damage to the valve seal.
Make sure to clean the pipe ends well before installing the valve.
Measuring Tape
Use a measuring tape to find the right place to cut the pipe. Accurate measurement avoids mistakes.
Measure twice and mark the spot before cutting to ensure precision.
Marker Or Pencil
A marker or pencil helps you mark where to cut the pipe. Clear marks guide you during the installation.
Use a waterproof marker to keep marks visible even if wet.
Gloves And Safety Glasses
Wear gloves to protect your hands from sharp pipe edges and tools. Safety glasses protect your eyes from debris.
Safety gear helps you avoid injuries during the installation process.
Towel Or Rag
Use a towel or rag to clean the pipe and catch any water that may drip. This keeps the work area dry.
Having rags handy makes the process cleaner and easier.
Credit: www.doityourself.com
Choosing The Right Shut Off Valve
Installing a Sharkbite shut off valve is a smart choice for plumbing. Picking the right valve is crucial. This guide will help you make the best selection.
Consider factors such as size, material, and function when choosing your shut off valve. A well-chosen valve ensures a reliable and long-lasting plumbing solution.
Understanding Valve Types
Sharkbite shut off valves come in various types. Each type serves a different purpose. It's important to know which one you need for your project.
- Angle valves are best for tight spaces
- Straight valves suit direct water lines
- Ball valves provide quick shut off
Considering Material
The material of the valve impacts durability and compatibility. Choose a material that matches your plumbing system.
- Brass is durable and resistant to corrosion
- Plastic is lightweight and easy to install
- Stainless steel is strong and long-lasting
Sizing The Valve Correctly
Correct sizing ensures a proper fit and function. Measure the pipes accurately to choose the right valve size.
| Pipe Diameter | Valve Size |
| 1/2 inch | 1/2 inch valve |
| 3/4 inch | 3/4 inch valve |
Evaluating Functionality
Consider how the valve will be used. Some valves are designed for specific tasks. Knowing the function helps in making the right choice.
- Use shut off valves for emergency water stops
- Control water flow with adjustable valves
- Install specialty valves for hot or cold lines
Preparing The Pipe
Installing a Sharkbite shut off valve starts with proper pipe preparation. This step ensures a secure and leak-free connection.
Take your time to prepare the pipe carefully. This will make the installation easier and safer.
Turning Off The Water Supply
Before you start, turn off the main water supply to avoid leaks or water damage. Find the main valve and close it fully.
Drain the pipes by opening a faucet downstream. This removes any water left in the pipe.
Cutting The Pipe
Use a pipe cutter to make a clean, straight cut where you want to install the valve. Avoid using a saw that can leave rough edges.
- Mark the cutting spot clearly on the pipe.
- Place the pipe cutter on the mark.
- Rotate the cutter around the pipe, tightening it slightly each turn.
- Continue until the pipe is cut through completely.
Cleaning And Deburring
After cutting, clean the pipe surface. Remove dirt, grease, and moisture to improve the valve’s grip.
Use a deburring tool or sandpaper to smooth the pipe’s inside and outside edges. This prevents damage to the valve’s O-ring.
| Tool | Purpose |
|---|---|
| Deburring Tool | Remove sharp edges inside and outside the pipe |
| Sandpaper | Smooth rough surfaces and clean the pipe |
| Clean Cloth | Wipe away dust and debris |

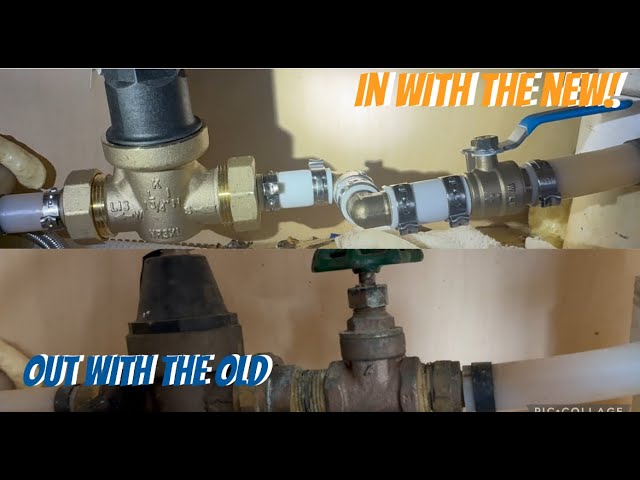
Credit: www.sharkbite.com
Installing The Sharkbite Valve
Installing a Sharkbite shut off valve is quick and easy. This valve allows you to stop water flow without special tools.
Follow simple steps to ensure a secure and leak-free connection. Proper installation helps your plumbing work well.
Marking The Insertion Depth
Before installing, mark the pipe to show how far the valve will push on. This prevents loose or too tight fitting.
- Check the valve packaging for the insertion depth measurement.
- Use a pencil or marker to make a clear mark on the pipe.
- Ensure the mark is straight and visible around the pipe’s circumference.
- Double-check the mark to avoid mistakes during installation.
Pushing The Valve Onto The Pipe
Push the valve straight onto the pipe until it reaches the marked line. Do not twist or bend the valve during this process.
| Action | Details |
| Align Valve | Hold the valve and align it with the pipe mark |
| Push Firmly | Push the valve straight on until the mark is inside the valve |
| Check Fit | Ensure the valve is flush and secure without gaps |
| Test Valve | Turn water on and check for leaks around the valve |
Testing The Installation
After installing the Sharkbite shut off valve, it is important to test it. Testing ensures the valve works correctly and does not leak.
This step helps avoid water damage and confirms a secure connection. Follow simple checks to test the valve.
Turning On The Water
Slowly turn on the main water supply after installing the valve. This allows water to flow through the valve carefully.
Watch for any sudden pressure or noises. If the valve is working right, water will flow smoothly without resistance.
Checking For Leaks
Look closely at the Sharkbite valve and surrounding pipes for any water drops. Even small leaks can cause damage over time.
- Use a dry cloth to wipe around the valve and check for wet spots.
- Inspect the connection points carefully for drips.
- Check again after 10-15 minutes to catch slow leaks.
If you find leaks, turn off the water and push the pipe firmly into the valve again. Retest after reseating the connection.
Tips For Maintenance And Troubleshooting
Installing a Sharkbite shut off valve helps control water flow easily. Keeping it maintained ensures it works well.
Knowing how to fix common problems saves time and prevents water damage.
Regular Inspection
Check the valve regularly for leaks or damage. Look for any signs of corrosion or cracks on the valve body.
Make sure the handle turns smoothly and fully stops water flow.
- Inspect every 3-6 months
- Look for water spots or rust
- Turn handle gently to test
Cleaning The Valve
Dirt and debris can block the valve. Clean the valve exterior with a damp cloth to remove dirt.
For internal cleaning, shut off the main water supply before removing the valve.
- Use a soft cloth for cleaning
- Avoid harsh chemicals
- Flush water lines if clogged
Handling Leaks
If you find leaks around the valve, check the connections first. Tighten fittings but do not overtighten.
Replace the valve if the leak continues or if the valve is cracked.
- Use a wrench to tighten fittings
- Check for damaged O-rings
- Replace valve if leaking persists
Troubleshooting Valve Stuck In Position
The valve handle may get stuck due to mineral buildup or corrosion. Try moving the handle gently back and forth.
If it stays stuck, apply a small amount of silicone lubricant on the stem.
- Do not force the handle
- Use silicone lubricant only
- Replace valve if stuck permanently
Testing Valve Operation
Test the valve by turning it off and on. Water flow should stop completely when off.
Check if water starts quickly when valve opens again without dripping.
- Turn valve fully off to stop water
- Turn valve fully on to restore flow
- Repeat test every few months
Frequently Asked Questions
What Tools Are Needed For Installing A Sharkbite Shut Off Valve?
You need a Sharkbite valve, pipe cutter, deburring tool, and a marker. These tools help ensure a clean and secure installation quickly.
How Do I Prepare The Pipe Before Installing The Valve?
Cut the pipe cleanly and remove any burrs. Wipe the pipe to remove dirt or grease for a tight seal.
Can I Install A Sharkbite Valve On Copper And Pex Pipes?
Yes, Sharkbite valves work on copper, PEX, CPVC, and PE-RT pipes. They offer versatile and easy installation across different pipe types.
How Do I Ensure The Sharkbite Valve Is Leak-free?
Push the valve firmly until it clicks on the pipe. Test by turning on water and checking for leaks around the joint.
Conclusion
Installing a Sharkbite shut off valve is simple and quick. Follow each step carefully for best results. This valve helps you control water flow easily. No special tools or skills are needed. Save time and avoid calling a plumber. Remember to check for leaks after installation.
Now, you can fix plumbing issues faster at home. Enjoy the convenience and peace of mind this valve brings.