Are you tired of worrying about the quality of your tap water? Installing a water filter under your sink is a simple way to enjoy clean, fresh-tasting water right at home.
Imagine having pure water for drinking, cooking, and even making coffee, without the hassle of buying bottled water. In this guide, you’ll learn exactly how to install a water filter under your sink step-by-step. No need to be a plumbing expert—just follow along, and you’ll have safe, filtered water in no time.
Ready to improve your water and your health? Let’s get started!

Credit: thelenmechanical.com
Choosing The Right Water Filter
Choosing the right water filter for under your sink is important. It helps make sure your water is clean and safe to drink. This guide will help you understand the key factors to consider.
Look at the type of filter, how long it lasts, and the certifications it holds. These details can guide you to the best choice for your home.
Types Of Under Sink Filters
Under sink water filters come in different kinds. Each type targets different impurities and uses various technologies.
- Carbon Filters:Remove chlorine, bad taste, and odors.
- Reverse Osmosis Filters:Remove many contaminants including lead and arsenic.
- Ultrafiltration Filters:Use membranes to block bacteria and viruses.
- Ceramic Filters:Filter out bacteria and sediment.
Filter Capacity And Lifespan
Filters have limits on how much water they can clean before needing replacement. Capacity depends on filter type and usage.
| Filter Type | Typical Capacity (Gallons) | Average Lifespan (Months) |
|---|---|---|
| Carbon Filter | 500 - 1000 | 6 - 12 |
| Reverse Osmosis | 300 - 600 | 6 - 12 |
| Ultrafiltration | 500 - 800 | 6 - 9 |
| Ceramic Filter | 1000 - 1500 | 12 - 18 |
Certifications And Standards
Check if the filter has certifications. These prove the filter meets safety and performance standards.
- NSF/ANSI 42:Reduces chlorine and improves taste.
- NSF/ANSI 53:Removes health-related contaminants.
- WQA Gold Seal:Ensures reliable product quality.
- EPA Standards:Meets environmental protection guidelines.

Credit: www.familyhandyman.com
Gathering Necessary Tools And Materials
Installing a water filter under your sink is a practical way to ensure clean water. Before you start, gather all the tools and materials needed for the job.
This guide will help you prepare everything you need for a smooth installation process.
List Of Required Tools
Having the right tools makes the installation process easier and faster. Here is a list of tools you will need.
- Adjustable wrench
- Pliers
- Screwdriver
- Tape measure
- Drill (if necessary for mounting)
Safety Equipment
It's important to prioritize safety while installing your water filter. Use the following safety equipment.
- Safety goggles
- Gloves
Replacement Parts
Replacement parts are crucial for the installation and maintenance of your water filter. Ensure you have these parts ready.
- Filter cartridges
- Fittings and connectors
- Teflon tape
Preparing The Installation Area
Installing a water filter under your sink needs good preparation. This helps the process go smoothly.
Before starting, clear the area and make sure everything is ready. This keeps the space safe and clean.
Clearing The Cabinet Space
Empty the cabinet under your sink. Remove all items to give yourself room to work.
Wipe the cabinet clean. This removes dust and dirt that can fall on tools or parts.
- Take out cleaning supplies and other stored items
- Use a cloth to wipe the bottom and sides
- Keep the space dry to avoid slips
Shutting Off Water Supply
Turn off the water supply to avoid leaks during installation. Find the valve under the sink.
Turn the valve clockwise until it stops. Check the faucet to make sure the water is off.
- Locate the cold water shutoff valve
- Turn the valve clockwise to close it
- Open the faucet to drain remaining water
Protecting Surrounding Surfaces
Cover surfaces near your workspace to protect from water and dirt. Use towels or plastic sheets.
This keeps your cabinet and floor clean. It also stops water damage if a leak happens.
- Place towels under pipes and fittings
- Use plastic or newspaper to cover the cabinet floor
- Keep tools on a tray to avoid scratches
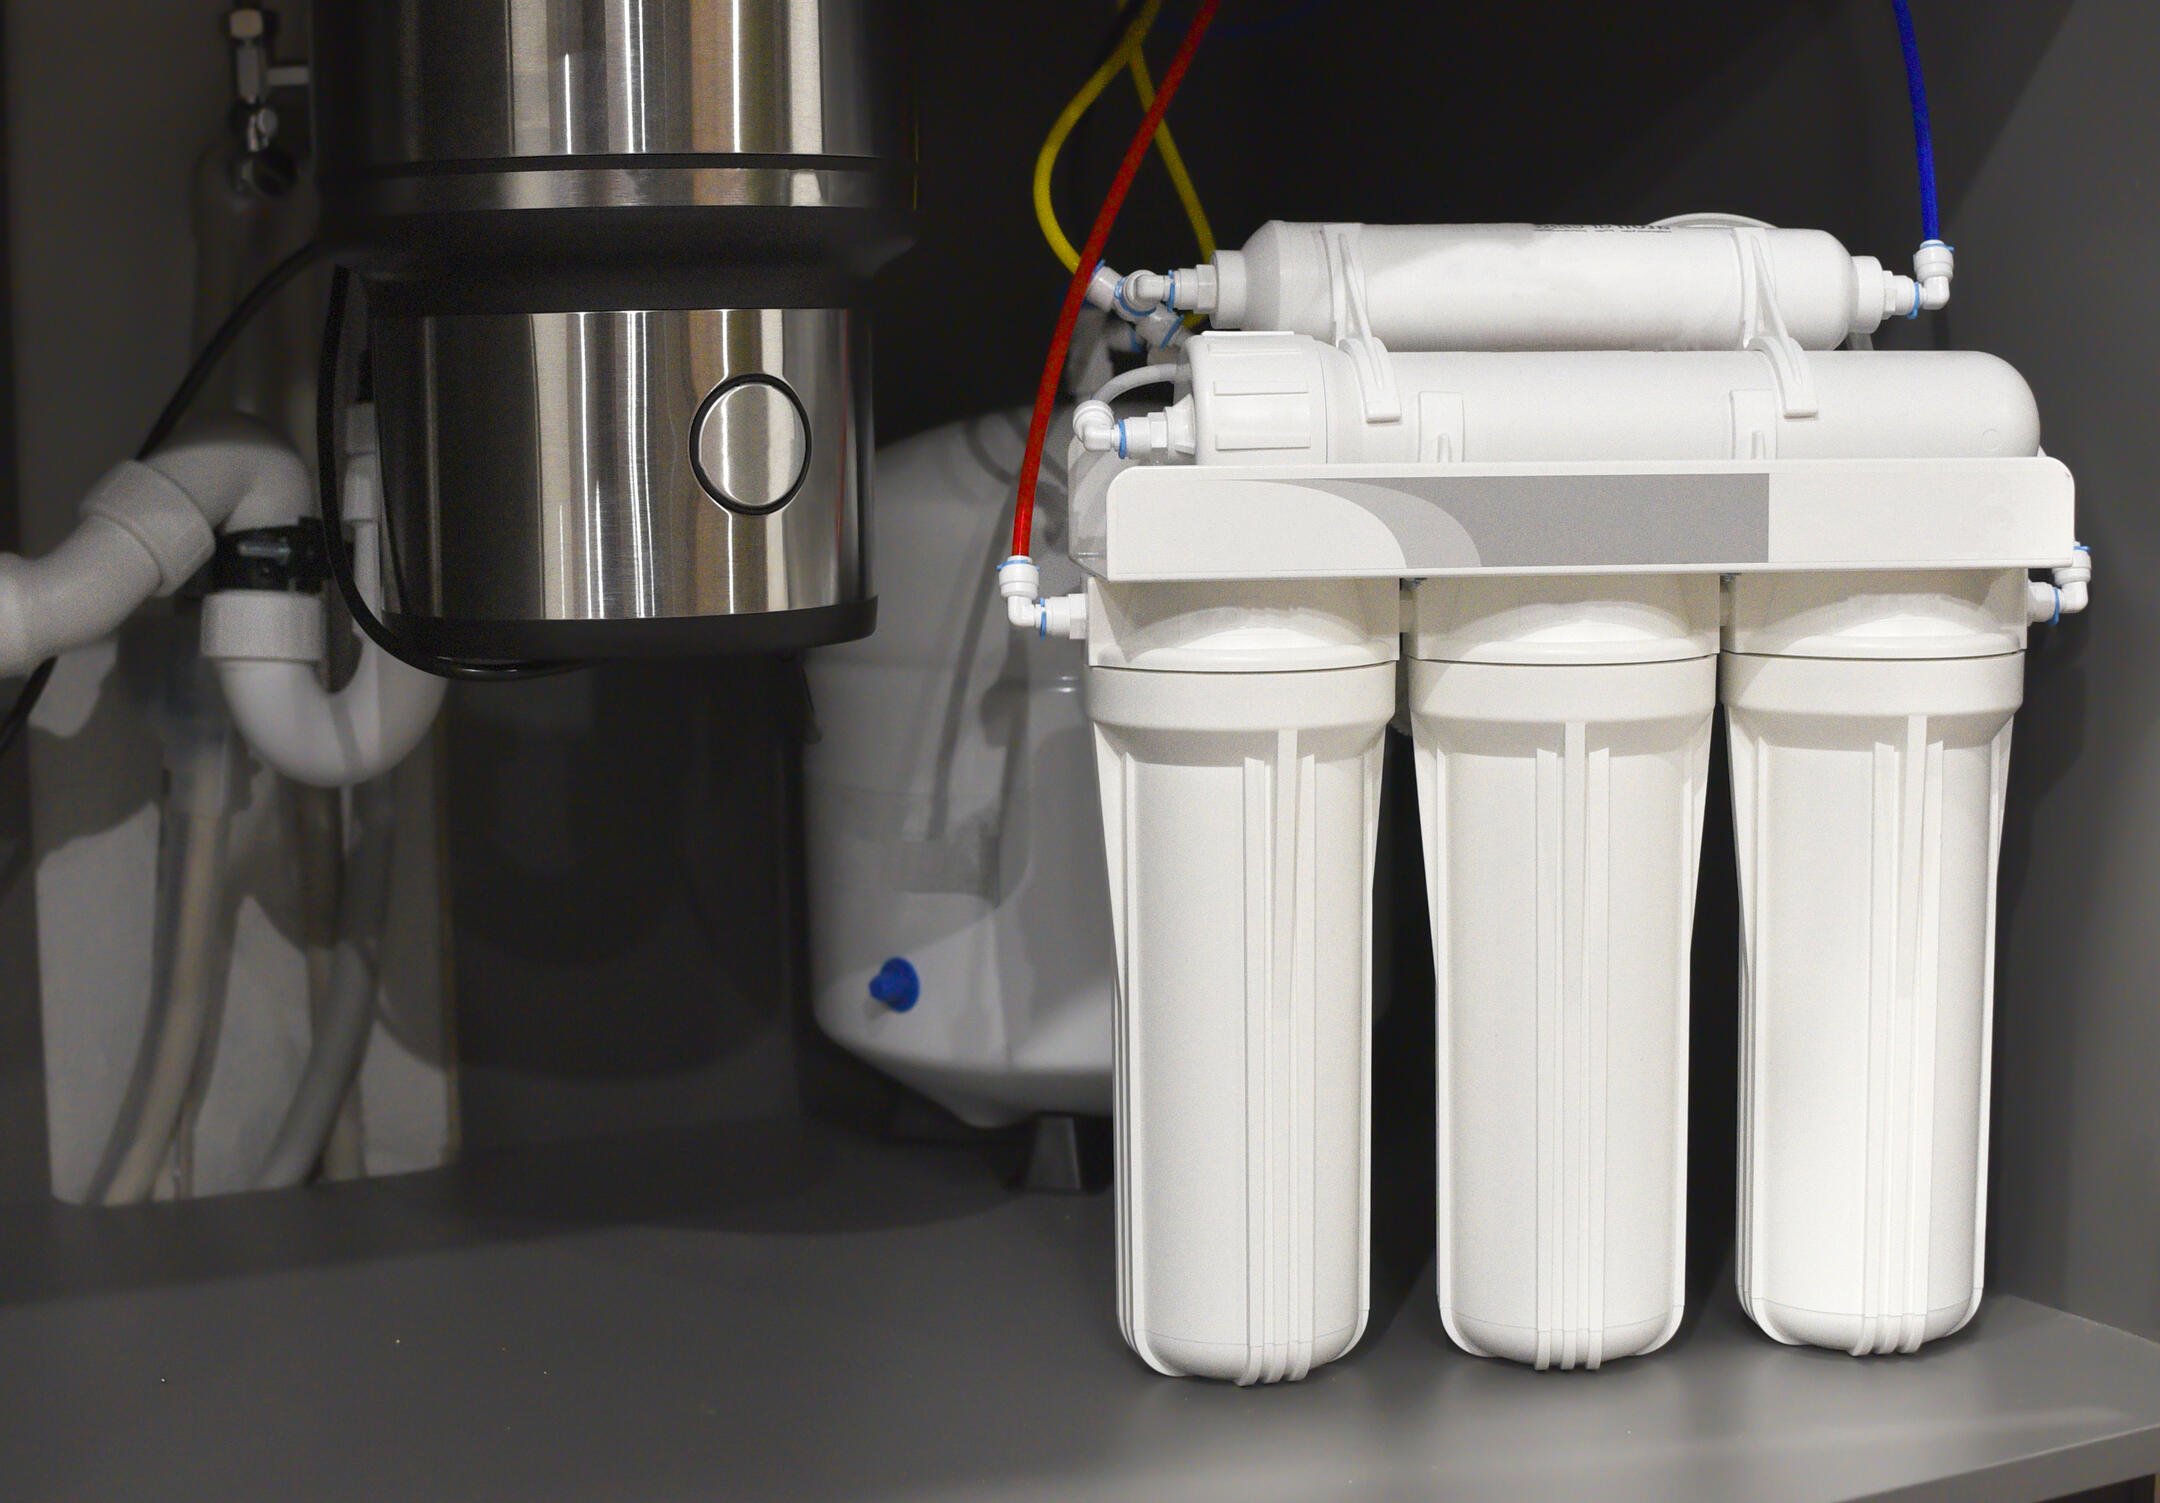
Installing The Water Filter System
Installing a water filter under your sink improves water quality. Follow simple steps to set up the system correctly.
This guide covers mounting the filter, connecting water lines, and securing tubing and fittings.
Mounting The Filter Unit
Choose a clear space under the sink to mount the filter. Use the mounting bracket that comes with the filter unit.
Mark the holes for screws on the wall or cabinet. Drill holes carefully and fix the bracket tightly to hold the filter unit.
Connecting Water Lines
Turn off the cold water supply before connecting the filter lines. Attach the inlet tube to the cold water valve.
- Connect the inlet tube to the filter’s input port.
- Attach the outlet tube from the filter to the faucet’s water line.
- Use the included adapters if needed to fit different pipe sizes.
- Double-check all connections for a tight fit.
Securing Tubing And Fittings
Secure all tubing with clips or brackets to prevent movement. Tighten fittings using a wrench without over-tightening.
| Fitting Type | Recommended Tightness | Notes |
| Compression Fittings | Firm, hand-tight plus 1/4 turn with wrench | Avoid overtightening to prevent damage |
| Push-to-Connect Fittings | Push tubing fully until it stops | No wrench needed |
| Threaded Fittings | Hand-tight plus 1/2 turn with wrench | Use plumber's tape on threads |
Testing The Water Filter
After installing your under-sink water filter, it is important to test it. Testing ensures the filter works properly and delivers clean water. This guide covers key steps to check your installation.
Follow each section carefully. Pay attention to water flow, leaks, and filter flushing. These checks keep your system safe and effective.
Turning On Water Supply
Slowly open the main water valve under the sink. Opening the valve slowly prevents sudden pressure that may damage the filter. Watch the water flow through the filter to confirm it is working.
Checking For Leaks
Inspect all connections around the filter. Look closely at joints, hoses, and the filter housing. Leaks can cause water damage and reduce filter performance.
- Check under the sink for drips or wet spots
- Feel around fittings for moisture
- Tighten any loose connections gently
- Use a dry cloth to detect small leaks
Flushing The Filter
Flush the filter to remove trapped air and loose carbon particles. Flushing improves water taste and clarity. Follow the recommended flush time for your filter model.
| Flush Time | Action |
| 2-3 minutes | Run cold water through the filter |
| After flushing | Check water clarity and taste |
| If cloudy | Continue flushing until clear |

Credit: www.familyhandyman.com
Maintaining Your Under Sink Filter
Keeping your under sink water filter clean and working well is important. Regular care helps the filter last longer.
Good maintenance ensures clean water and stops problems before they start. Follow simple steps to keep it in shape.
Regular Filter Replacement
Replace the filter cartridge as the maker says. Usually, this is every 3 to 6 months.
A worn filter will not clean water well. Changing it on time keeps water fresh and safe.
- Turn off the water supply before replacing the filter
- Remove the old filter carefully
- Install the new filter firmly in place
- Turn the water back on and check for leaks
Cleaning The System
Clean the filter housing and parts every few months. This stops dirt and germs from building up.
Use a soft cloth and mild soap to wipe parts. Rinse well before putting them back.
- Turn off the water and release pressure
- Remove the filter cartridge and clean the housing
- Check seals and O-rings for damage
- Replace parts if they look worn out
- Put everything back and turn water on slowly
Troubleshooting Common Issues
If water flow slows, check for clogging or leaks. These issues often cause poor performance.
Listen for strange sounds or watch for water spills. These signs mean the filter needs attention.
- Slow water flow: replace clogged filter or clean housing
- Leaks: tighten connections or replace damaged seals
- Bad taste or smell: change the filter cartridge
- Air in water: flush the system after filter change
Frequently Asked Questions
How Do I Install An Under Sink Water Filter?
First, turn off the water supply. Attach the filter to the cold water line under the sink. Connect the filter’s output to the faucet. Secure all connections and check for leaks before use.
What Tools Are Needed For Under Sink Filter Installation?
You will need an adjustable wrench, a drill, a screwdriver, plumber’s tape, and a bucket. These tools help you disconnect pipes, mount the filter, and prevent leaks during installation.
How Long Does It Take To Install A Water Filter?
Installation usually takes 30 to 60 minutes. Time varies depending on your plumbing setup and the filter type. Follow instructions carefully for a smooth process.
Can I Install The Filter Myself Or Hire A Plumber?
Most filters are designed for DIY installation. However, hiring a plumber ensures professional setup and avoids potential mistakes. Choose based on your comfort with plumbing tasks.
Conclusion
Installing a water filter under your sink improves water quality at home. The process is simple and saves money on bottled water. Follow each step carefully for best results. Check for leaks and test the water after installation. Clean or replace the filter regularly to keep water fresh.
Enjoy clear, safe water straight from your tap. This small upgrade brings big benefits to your daily life.