If you want clean, fresh-tasting water from your GE MWF filter, knowing how to replace it is key. A worn-out filter can affect the taste and quality of your water and even harm your appliance.
But don’t worry—changing your GE MWF water filter is easier than you think. In this guide, you’ll get simple, step-by-step instructions that anyone can follow. By the end, you’ll have your filter replaced quickly, so you can enjoy pure water without any hassle.
Keep reading to learn how to do it right the first time.
Tools Needed
Replacing a GE MWF water filter requires a few simple tools. Having the right tools helps make the process quick and smooth.
This guide lists the tools you need to replace your water filter safely and correctly.
Screwdriver
A screwdriver is useful to open the filter cover if your model has screws. Most models use a Phillips head screwdriver, but a flathead might be needed for some.
Bucket Or Bowl
Keep a bucket or bowl nearby to catch any water that may drip during the filter change. This keeps your area clean and dry.
Towel Or Cloth
A towel or cloth helps wipe up spills and dry the filter area. It also protects surfaces from water damage.
Replacement Ge Mwf Water Filter
Make sure you have the correct GE MWF replacement filter. Using the right filter ensures proper water flow and filtration.
Gloves (optional)
Wearing gloves can keep your hands clean and protect you from germs during the filter swap.
- Phillips or flathead screwdriver
- Bucket or bowl for water catch
- Towel or cloth for cleaning
- Replacement GE MWF water filter
- Protective gloves (optional)
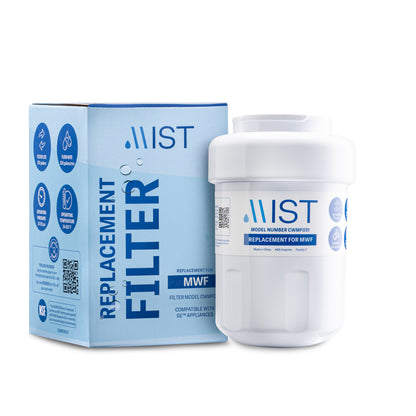
Credit: www.mistfilters.com
Locate The Water Filter
Knowing where the water filter is helps you replace it quickly. The GE MWF water filter is easy to find if you know where to look.
This guide shows common places to find the filter in your fridge or water system.
Inside The Refrigerator Compartment
Many GE fridges place the water filter inside the main compartment. Look near the top right or left corner. It may be behind a small cover or grille.
Base Grille Or Kick Plate
Some models have the water filter at the bottom front. Check the base grille or kick plate. The filter is usually housed behind a removable panel.
Inside The Refrigerator Door
For certain GE fridges, the water filter is inside the door. Open the fridge door and check the upper right or left side. The filter might be hidden behind a small cover.
Common Water Filter Locations
| Location | Description | How to Access |
| Top Right Inside Compartment | Filter behind a grille or cover | Open fridge, locate cover, twist filter to remove |
| Base Grille / Kick Plate | Filter behind lower panel near floor | Remove grille panel, pull out filter |
| Inside Refrigerator Door | Filter in upper door section | Open door, find cover, twist filter out |
Remove The Old Filter
Replacing your GE MWF water filter is important for clean and fresh water. Follow these steps to easily remove the old filter.
Make sure you have a new filter ready before starting. This process takes just a few minutes.
Turn Off Water Supply
Before removing the old filter, you need to turn off the water supply. This prevents leaks and makes the process easier.
- Locate the shut-off valve near your refrigerator.
- Turn the valve clockwise to stop the water flow.
- Double-check that the water is off by trying to dispense water from the fridge.
Twist And Pull Out
Now that the water is off, you can remove the filter. It’s a simple twist and pull motion.
Grip the old filter firmly and twist it counterclockwise. Once loose, gently pull it out and discard it.

Credit: www.amazon.com
Prepare The New Filter
Replacing your GE MWF water filter needs care and attention. Preparing the new filter right makes sure your water stays clean and fresh.
This guide helps you unpack and inspect the filter. It also shows how to flush it before use.
Unpack And Inspect
Open the package carefully. Check the filter for damage or dirt. Make sure the seal is intact. A damaged filter can cause leaks or poor water quality.
- Remove the filter from the box.
- Look for cracks or dents on the filter body.
- Check the O-ring for any tears or dirt.
- Ensure the filter has the correct model number.
- Do not remove the protective covers until ready to install.
Flush The Filter
Flushing removes loose carbon dust inside the filter. It helps avoid cloudy or bad-tasting water after installation.
| Action | Details |
| Attach filter to water source | Connect the filter to a faucet or water line. |
| Run water | Let water flow through the filter for 5 minutes. |
| Check water clarity | Water should run clear without black particles. |
| Turn off water | Close the faucet before installing the filter. |
Install The New Filter
Installing a new GE MWF water filter is simple and quick. This guide will help you put the filter in the right way.
Make sure the filter fits correctly to keep your water clean and fresh. Follow these steps carefully.
Align And Insert
First, check the new filter and the filter housing. The arrows on the filter show how to align it.
Hold the filter so the arrows point toward the back of the fridge. Then, insert the filter into the slot.
- Locate the filter slot inside the fridge
- Match the arrow on the filter with the slot direction
- Push the filter straight into the slot until it stops
Twist To Secure
After inserting, turn the filter clockwise to lock it in place. You will feel it click when secure.
Do not force the twist. Stop when the filter feels tight and locked. This prevents leaks and keeps water clean.
- Turn the filter clockwise about a quarter turn
- Listen for a click or feel resistance
- Check that the filter is firmly locked
- Wipe any water drips from the area

Credit: www.amazon.com
Turn On Water And Check
After replacing the GE MWF water filter, you need to turn the water back on. This helps the filter to start working properly.
Check the water flow to make sure everything is connected right. Look for any unusual sounds or low water pressure.
Flush The System
Flushing the system removes any air and loose carbon from the new filter. This ensures clean water taste.
Run water through the dispenser for 5 minutes or about 3-4 gallons.
- Place a large container under the dispenser.
- Turn on the water dispenser.
- Let the water run until clear and free of particles.
- Turn off the dispenser when done.
Check For Leaks
After flushing, check around the filter and connections for leaks. Leaks can waste water and cause damage.
Look for any water drops or wet spots near the filter housing and fittings.
- Wipe the area dry with a clean cloth.
- Watch for leaks for a few minutes.
- Tighten connections if you see leaks.
- If leaks persist, reinstall the filter properly.
Reset Filter Indicator
The GE MWF water filter has an indicator that tells you when to change the filter. After replacing the filter, you need to reset this indicator. Resetting helps the system track the new filter's life.
This guide shows how to reset the filter indicator easily. Follow the steps to ensure your water filter works correctly.
Locate The Filter Reset Button
First, find the reset button on your refrigerator. It is usually near the water dispenser or inside the fridge on the control panel. The button may be labeled “Reset,” “Filter Reset,” or “Water Filter.”
How To Reset The Filter Indicator
Press and hold the reset button for about 3 seconds. You will see the indicator light blink or turn off. This means the filter status has reset.
- Locate the reset button on the fridge.
- Press and hold the button for 3 seconds.
- Wait for the indicator light to change.
- Release the button.
- Confirm the light stays off or shows a new status.
When The Indicator Does Not Reset
If the indicator stays on, try these tips:
- Make sure you held the button long enough.
- Check if the new filter is installed correctly.
- Unplug the fridge for 5 minutes, then try again.
- Consult the user manual for your refrigerator model.
Filter Indicator Light Meanings
| Light Color | Meaning |
| Green | Filter is new or reset |
| Yellow | Filter needs replacement soon |
| Red | Filter needs immediate replacement |
Maintenance Tips
Replacing your GE MWF water filter regularly keeps water clean and fresh. Proper care helps your filter work well longer.
Follow these tips to maintain your water filter and avoid common problems.
Check Filter Life Regularly
Look at the filter indicator on your refrigerator if it has one. It tells you when to change the filter. If no indicator, change the filter every six months.
Flush The Filter After Installation
After putting in a new GE MWF filter, run water for about five minutes. This removes air and loose carbon bits.
Clean Around The Filter Area
Keep the area where the filter sits clean. Wipe it with a damp cloth to stop dirt and mold buildup.
Store Spare Filters Properly
- Keep filters in a cool, dry place
- Do not remove the packaging until ready to use
- Avoid direct sunlight on the filters
Troubleshoot Common Issues
| Issue | Possible Cause | Solution |
| Low water flow | Clogged filter | Replace filter |
| Bad taste or smell | Old filter | Change filter immediately |
| Water leaks | Improper installation | Check filter seating and seals |
Frequently Asked Questions
How Often Should I Replace A Ge Mwf Water Filter?
Replace the GE MWF water filter every 6 months or after filtering 300 gallons. This ensures clean, fresh water and optimal performance.
What Are The Signs A Ge Mwf Filter Needs Replacing?
Signs include reduced water flow, bad taste, or odor. If any appear, change the filter promptly for safe drinking water.
How Do I Safely Remove The Old Ge Mwf Filter?
Turn off the water supply first. Twist the old filter counterclockwise, then pull it out gently to avoid water spills.
Can I Use Any Replacement Filter For Ge Mwf?
No, use only compatible GE MWF replacement filters. Using the correct filter maintains water quality and appliance warranty.
Conclusion
Replacing a GE MWF water filter keeps your water clean and fresh. Follow the steps carefully to avoid mistakes. Change the filter every six months for best results. Clean water helps your family stay healthy and hydrated. The process is simple and saves money.
Take your time and enjoy better tasting water. You can do this yourself, no special tools needed. Keep your filter fresh and your water pure.