Are you wondering how to change the water filter in your Whirlpool refrigerator? It might seem tricky at first, but with the right steps, you can do it quickly and easily.
Changing your water filter is important to keep your water tasting fresh and your fridge working well. In this guide, you’ll learn exactly what to do, so you can enjoy clean, pure water without any hassle. Keep reading, and you’ll be a pro at changing your Whirlpool refrigerator’s water filter in no time!
Credit: hkgpp.com
Signs To Replace The Water Filter
Water filters in Whirlpool refrigerators clean your water. Over time, they get clogged and less effective. It is important to know when to change the filter.
Changing the filter keeps your water fresh and safe to drink. Look for signs that show the filter needs replacement.
Reduced Water Flow
If water comes out slowly from the dispenser, the filter may be blocked. A clogged filter limits water flow. This is a common sign that you need a new filter.
Check the flow by pressing the water lever. If water drips or flows weakly, replace the filter soon to avoid damage to your refrigerator.
Unusual Taste Or Odor
Water should taste clean and fresh. If your water tastes strange or smells bad, the filter may be old or clogged. This means it is not filtering properly.
Changing the filter will improve the taste and remove unwanted smells from your water and ice.
Filter Indicator Light
Many Whirlpool refrigerators have a filter indicator light. This light turns on or changes color when it is time to replace the filter.
Watch this light closely. It helps you know exactly when the filter is no longer effective and needs a change.

Credit: www.whirlpool.com
Gathering Necessary Tools
Changing the water filter in your Whirlpool refrigerator is easy. Start by gathering the right tools and supplies.
Having everything ready will make the process smooth and quick.
Locating The Replacement Filter
First, find where your water filter is located in the refrigerator. This is often at the base grill or inside the fridge.
- Check the owner's manual for specific location.
- Look for a small knob or cap indicating the filter position.
- Ensure the fridge is unplugged before you start.
Additional Supplies
To complete the filter change, gather these additional supplies.
| Supply | Purpose |
| Replacement filter | New filter for water purity |
| Towel | To catch any water drips |
| Bucket | For disposing of old filter |
Locating The Water Filter
Knowing where the water filter is helps you change it quickly. Whirlpool refrigerators have filters in two common spots.
This guide shows how to find the filter inside the fridge and near the base or grille.
Inside The Refrigerator Compartment
The water filter is often inside the fridge compartment. It usually sits in the upper right or left corner near the ceiling.
- Open the main fridge door fully.
- Look for a small cover or a round cap near the top.
- The filter might be behind a push-button or twist-off door.
- Check for labels or icons showing the filter location.
Near The Base Or Grille
Some Whirlpool refrigerators place the water filter near the base or grille. This area is at the front bottom part of the fridge.
| Location | How to Identify | Notes |
|---|---|---|
| Front base grille | Look for a small door or panel on the grille | May require opening or sliding the panel |
| Bottom right or left corner | Check for a round or rectangular filter housing | Usually easy to pull or twist out |
| Near the kickplate | Filter may be behind a vent or cover | Use a flashlight if needed |

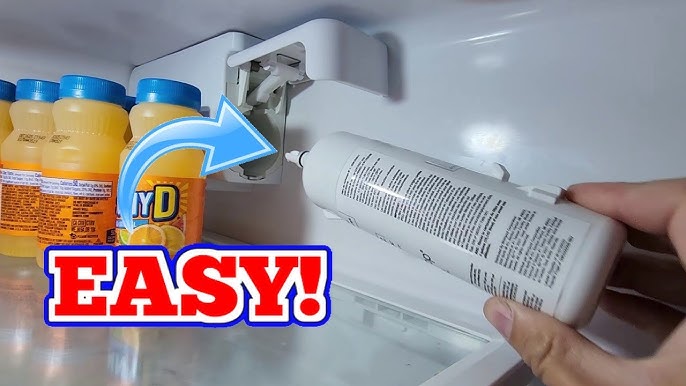
Credit: www.youtube.com
Removing The Old Filter
Changing the water filter in your Whirlpool refrigerator helps keep your water clean. Start by removing the old filter carefully.
This guide explains how to remove the old filter step by step.
Turning Off The Water Supply
Before you remove the filter, turn off the water supply to the fridge. This stops water from leaking out.
Find the water valve behind or under your refrigerator. Turn it clockwise to close it tightly.
- Locate the water valve near the fridge
- Turn the valve clockwise to shut off water
- Check that water flow has stopped
Twisting And Pulling Out The Filter
Next, open the filter cover inside the fridge. Grasp the filter firmly and twist it counterclockwise.
Once it loosens, pull the filter straight out. Be ready to catch any water that may drip.
- Open the filter compartment
- Hold the filter firmly
- Turn the filter left to unlock
- Pull the filter out slowly
- Use a towel to catch drips
Installing The New Filter
Installing a new water filter in your Whirlpool refrigerator is simple. It helps keep your water clean and fresh.
Follow these steps to install the new filter correctly and ensure your fridge works well.
Aligning The Filter Correctly
First, find the new filter's alignment marks. These help position the filter properly in the slot.
Hold the filter with the arrows or marks facing the correct direction. This ensures the filter fits without damage.
- Look for arrows or notches on the filter
- Match these with the slots inside the filter housing
- Keep the filter straight to avoid cross-threading
Securing The Filter In Place
Once aligned, insert the filter into the slot gently. Push it in until it stops.
Turn the filter clockwise to lock it. You will feel resistance when it is secure.
- Push the filter straight into the housing
- Rotate the filter clockwise about a quarter turn
- Stop turning when the filter feels tight and secure
- Check for any leaks after installation
Flushing The New Filter
After installing a new water filter in your Whirlpool refrigerator, flushing is important. It clears air and debris from the filter. This helps keep your water clean and fresh.
Flushing also prepares the filter for regular use. Follow simple steps to ensure your filter works well.
Running Water To Clear Air And Debris
Start by running water through the new filter. This removes trapped air and any loose particles inside. Run water for about 3 to 5 minutes or 1 to 2 gallons.
Use a large container to catch the water during flushing. The water may look cloudy at first, but it will clear up.
- Place a container under the dispenser.
- Press the water dispenser for several minutes.
- Watch for clear water flow.
- Stop when water runs clear and steady.
Checking For Leaks
After flushing, check the filter and connections for leaks. Leaks can cause water damage and reduce filter performance.
Look for wet spots or dripping around the filter area. Tighten the filter if needed, but do not overtighten.
- Inspect the filter housing and seal.
- Wipe any water drops with a dry cloth.
- Replace the filter if leaks persist.
Resetting The Filter Indicator
After changing the water filter in your Whirlpool refrigerator, you need to reset the filter indicator. This light tells you when to replace the filter. Resetting it keeps your fridge working properly.
Resetting is easy and helps you track filter changes. Follow the steps below to reset the filter indicator using the control panel and confirm the reset.
Using The Control Panel
Find the control panel on the front of your refrigerator. Look for the button labeled "Filter Reset" or "Water Filter".
Press and hold this button for about 3 seconds. The filter indicator light will start to blink or turn off. This means the reset process has started.
- Locate the "Filter Reset" button on the control panel.
- Press and hold the button for 3 seconds.
- Watch for the indicator light to change.
Confirming Reset Completion
Check the filter indicator light after resetting. The light should be off or show a new color that means reset.
If the light stays on or blinks, repeat the reset steps. Make sure to hold the button long enough. Your filter indicator is now ready to track your next filter change.
Maintenance Tips For Water Filters
Water filters in Whirlpool refrigerators need regular care. Proper maintenance helps keep water clean and tasting fresh.
Changing the filter on time improves the fridge’s performance. It also protects your health by removing impurities.
Recommended Replacement Frequency
Whirlpool suggests changing the water filter every six months. This keeps the filter working well and water safe.
Some factors can make you change it sooner. These include heavy water use or poor water quality in your area.
- Replace filter every 6 months for best results
- Change sooner if water flow slows down
- Look for taste or odor changes in water
- Check the filter indicator light on the fridge
Storing Spare Filters
Keep spare filters in a cool, dry place away from sunlight. This helps the filter stay fresh until use.
Store filters in their original packaging. This protects them from dust and damage before installation.
- Use original box or sealed bag for storage
- Store at room temperature, away from heat
- Avoid placing filters near chemicals or strong odors
- Check the filter’s expiration date before use
Frequently Asked Questions
How Often Should I Change A Whirlpool Refrigerator Water Filter?
You should replace the water filter every 6 months or after filtering 200 gallons. Frequent changes ensure clean, fresh-tasting water and optimal appliance performance.
Where Is The Water Filter Located In Whirlpool Refrigerators?
The water filter is typically inside the fridge, near the top right corner or in the base grille. Check your model’s manual for exact location.
How Do I Reset The Water Filter Indicator Light?
After replacing the filter, press and hold the reset button for 3 seconds. The indicator light will turn off, signaling a successful reset.
Can I Use Non-whirlpool Filters In My Fridge?
It’s best to use Whirlpool-approved filters for guaranteed fit and water quality. Non-branded filters may void warranty or reduce performance.
Conclusion
Changing a water filter in your Whirlpool refrigerator is simple. Just follow the steps carefully and take your time. Clean water means better taste and healthier drinks. Regular filter changes keep your fridge running smoothly. Don’t wait until water flow slows down or tastes bad.
A fresh filter saves money on repairs later. Keep your family happy with clean water every day. Now, you can easily do this task yourself. No need to call a technician or spend extra money. Just a few minutes, and your fridge works like new again.